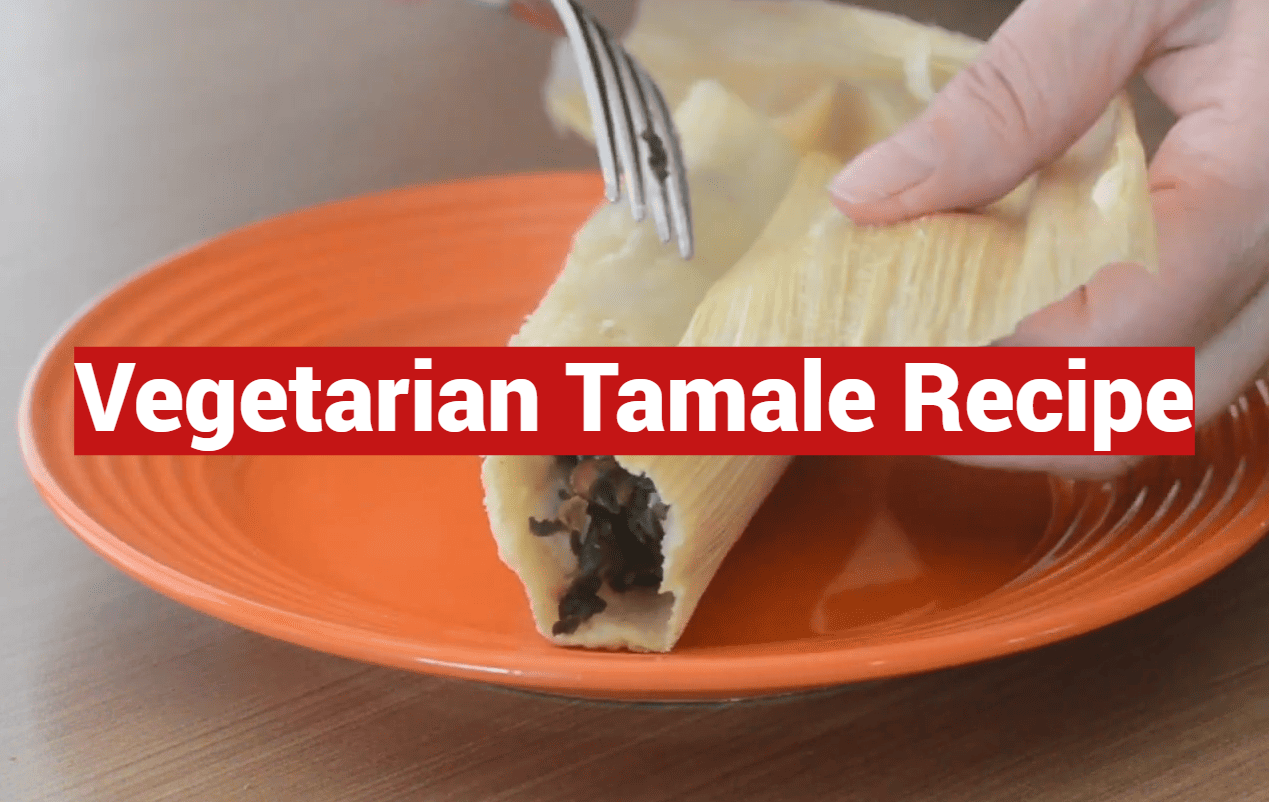
Did you know that over two billion tamales are consumed in the United States during the holiday season alone? This staggering number shows just how deeply this cherished dish is woven into our cultural fabric.
Welcome to your friendly, step-by-step guide for creating these delicious bundles from the comfort of your own kitchen. We believe that crafting authentic, meat-free versions of this classic is an achievable and rewarding experience for everyone.
This guide will walk you through the entire process. We cover everything from choosing the best masa and preparing your steamer to mastering the perfect fold. You’ll learn how to achieve that signature fluffy, tender texture that makes this dish so special.
We’ve included several tasty filling ideas to explore, like cheese with green chiles and savory black beans. This allows you to customize your creation to match your personal taste preferences perfectly.
By the end, you’ll feel confident enough to host your own gathering. Get ready to fill your home with incredible aromas and share a wonderful homemade meal.
Key Takeaways
- This guide makes the process of creating meat-free tamales simple and approachable for all skill levels.
- You will learn essential techniques, from preparing the dough to the final steaming step.
- Multiple filling options are provided to allow for easy customization.
- The goal is to help you achieve a perfect, fluffy texture in your final dish.
- This recipe is ideal for holidays, family gatherings, or any time you want authentic comfort food.
- Hosting a tamale-making party is a fun and rewarding way to share this tradition.
Introduction to Vegetarian Tamales
For over 450 years, these handcrafted bundles have been at the heart of celebrations across Mexico and Central America. They represent a beautiful tradition that connects generations through shared kitchen experiences.
What Makes Tamales Special
The magic lies in the careful preparation process. Families often gather for tamaladas, where everyone helps assemble these delicious packages.
Each one features fluffy masa dough wrapped in natural corn husks. The steaming process creates a tender texture that’s hard to resist. This method also infuses the dish with subtle earthy aromas.
Modern versions maintain authentic qualities while adapting ingredients. They use plant-based fats instead of traditional animal products.
A Brief History and Cultural Significance
These traditional dishes have evolved significantly over time. Originally, they were portable foods made with simple, available ingredients.
The introduction of new ingredients changed the recipe’s character. Earlier versions had a denser texture compared to today’s fluffy creations.
Throughout history, these meals have been reserved for special occasions. They represent gifts of love and cultural preservation.
| Aspect | Traditional Version | Modern Adaptation |
|---|---|---|
| Primary Fat Source | Animal-based fats | Plant-based alternatives |
| Texture | Denser, harder consistency | Fluffy, tender masa |
| Preparation Time | Lengthy family gatherings | Adaptable to modern schedules |
| Cultural Role | Special occasion centerpiece | Everyday celebration food |
This evolution shows how culinary traditions can adapt while maintaining their core significance. The rich flavor and cultural importance remain unchanged.
Essential Ingredients and Tools
The secret to perfect tamales lies in selecting quality ingredients and having the proper tools ready before you start mixing. Proper preparation ensures a smooth cooking experience and delicious results.
Masa Harina, Spices, and Dairy Alternatives
Start with masa harina, the instant corn flour specifically made for this dish. Look for bags labeled “for tamales” – Maseca is a reliable brand that delivers consistent results.
For the fat component, choose high-quality options like European-style butter, vegetable shortening, or coconut oil. Don’t forget baking powder – it’s crucial for creating light, fluffy texture.
Season with kosher salt and ground cumin for warmth. Add your favorite cheese like jack or cheddar, along with diced green chiles for authentic flavor.
Corn Husks and Recommended Kitchen Equipment
Purchase dried corn husks without preservatives from Mexican markets or mainstream stores. Soak these husks in hot water to make them pliable for wrapping.
Essential equipment includes a large stockpot with a steamer rack. A stand mixer with paddle attachment makes mixing easier, though hand mixing works perfectly fine.
| Ingredient Type | Traditional Choice | Modern Alternative | Best For |
|---|---|---|---|
| Fat Source | European Butter | Coconut Oil | Rich flavor |
| Dairy Base | Whole Milk | Plant Milk | Dietary needs |
| Seasoning | Kosher Salt | Sea Salt | Even distribution |
Preparing the Masa and Filling
Before you can wrap those delicious bundles, you’ll need to prepare two essential components. The quality of your masa dough and fillings will determine your final results. This stage requires patience and attention to detail.
Whipping Up a Fluffy Masa Dough
Start by beating your fat in a stand mixer for about 5 minutes. Use the paddle attachment for best results. The mixture should become light and airy.
Whisk together your dry ingredients in a separate bowl. Combine masa harina with salt, baking powder, and spices. This ensures even distribution throughout the dough.
Blend your liquid ingredients until smooth. Pour this mixture over the dry ingredients and stir well. The consistency should be thick but manageable.
Add the masa mixture to your whipped fat in three additions. Mix thoroughly between each addition. This creates a uniform texture.
Increase the mixer speed to high and beat for 8 minutes. This extended mixing creates air pockets. Your dough will become light and fluffy.
Test your masa with the float test. Drop a teaspoon into a cup of cool water. If it floats, your dough is ready.
Choosing and Mixing the Perfect Filling
Select fillings that complement your masa dough. Popular options include black beans with green chiles. Cheese and roasted peppers also work beautifully.
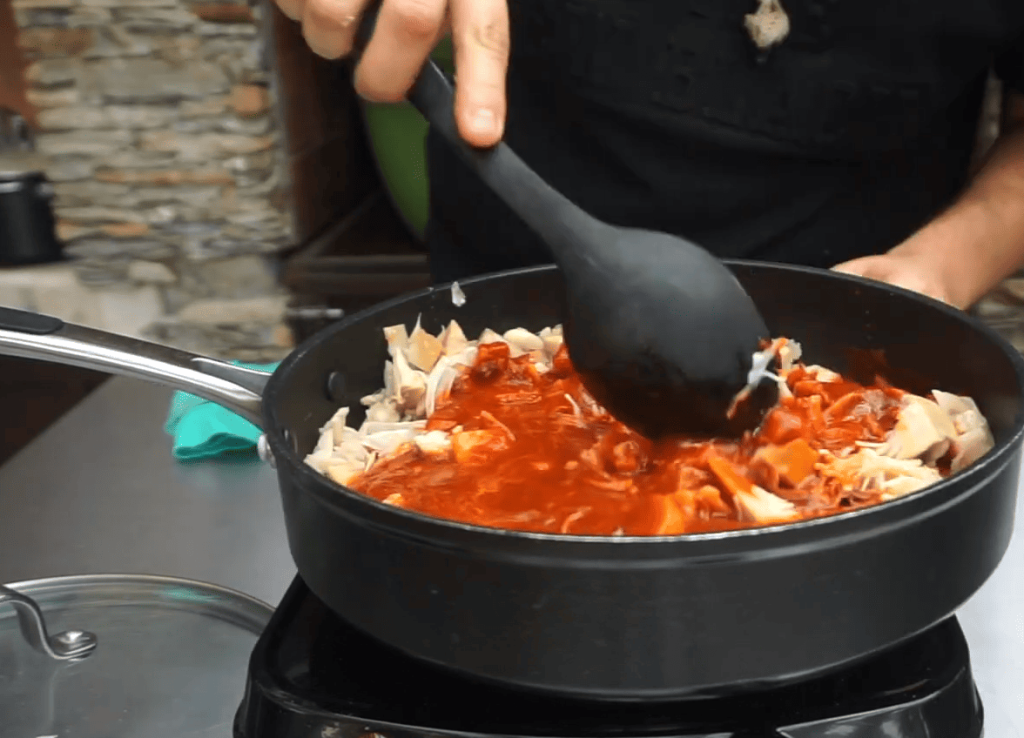
Prepare your fillings at room temperature before assembly. This ensures even cooking during steaming. Sauté mushrooms with onions and garlic for a rich flavor.
Season your fillings generously with spices. Cook until liquids evaporate and flavors concentrate. Your fillings should be flavorful but not watery.
Step-by-Step Tamale Assembly Process
The assembly stage brings everything together, creating the signature wrapped packages that steam to perfection. This hands-on process is both meditative and rewarding. You’ll transform simple ingredients into beautiful, edible parcels.
Spreading the Masa and Adding Your Filling
Start with well-soaked corn husks that are soft and pliable. Pat them dry to remove excess moisture. Set up your workstation with masa, filling, and extra husk strips for tying.
Place each corn husk with the pointy end toward you. Identify the smooth side for spreading. Scoop about ¼ cup of masa into the center of the rectangular portion.
Spread the dough evenly, leaving a generous border around all edges. This prevents leakage during cooking. Add your filling in a line down the center. Be careful not to overfill.
Rolling Techniques for Neat Tamale Packets
Begin rolling by folding the right side over the filling. Bring the left side over to overlap. Tuck it underneath for a tight cylinder. The masa edges should meet neatly.
Fold the bottom pointy end upward toward the filled portion. If desired, tie with a strip of corn husk. Many cooks simply rely on the weight of stacked bundles to stay closed.
Continue assembling until all husks are used. Arrange your finished creations with open ends facing up. They’re now ready for steaming.
Cooking Techniques for Perfect Vegetarian Tamales
The final transformation of your carefully assembled bundles happens during the steaming process. This gentle cooking method unlocks the masa’s full potential, creating that signature light, fluffy texture everyone loves.
Mastering your steamer setup ensures consistent results every time. The right technique separates good creations from exceptional ones.
Proper Steaming Methods
Start by filling your stockpot about one-third full with hot water. Place your steamer basket inside, ensuring the water doesn’t touch the bottom.
Line the basket with leftover corn husks that were too small for wrapping. This protects your bundles from direct heat while adding subtle flavor.
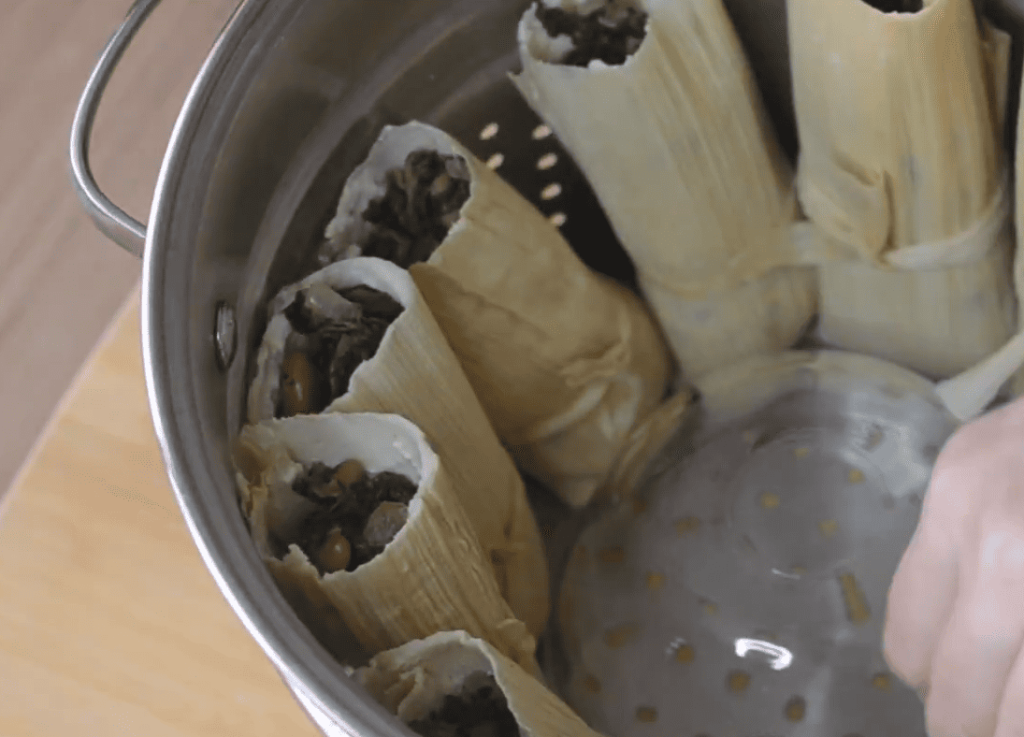
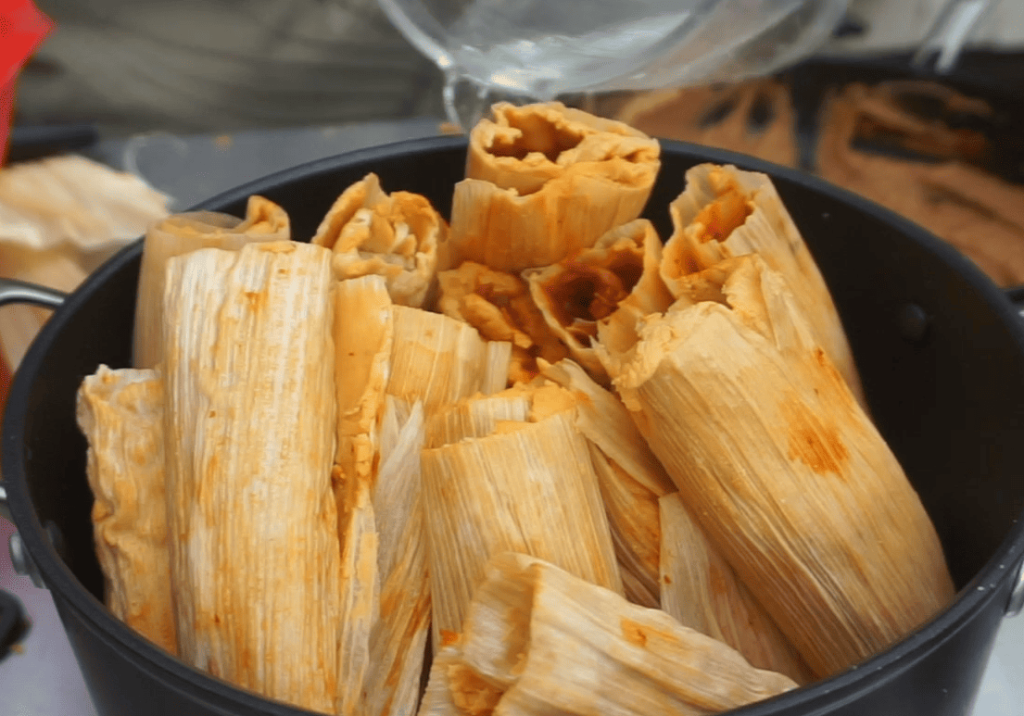
Arrange your creations vertically in the steamer, open-end up. Pack them snugly so they support each other. Fill any gaps with extra husks or a clean towel to prevent tipping.
Cover the tops with another layer of husks before securing the lid. This traps steam for even cooking throughout the pot.
Checking for Doneness and Adjusting Time
Bring the water to a boil, then reduce to medium heat. Maintain a steady steam for 1 hour 45 minutes to 2 hours. Smaller bundles may cook in 40-90 minutes.
Check the water level after 40 minutes. Add more hot water carefully down the side of the pot if needed. Never pour over the open ends.
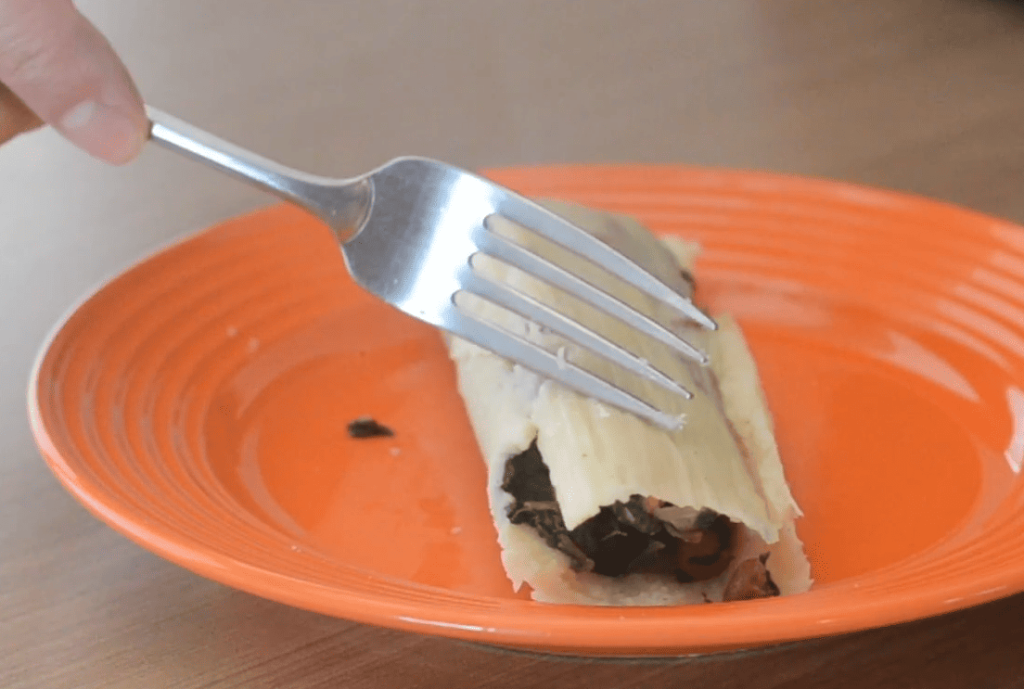
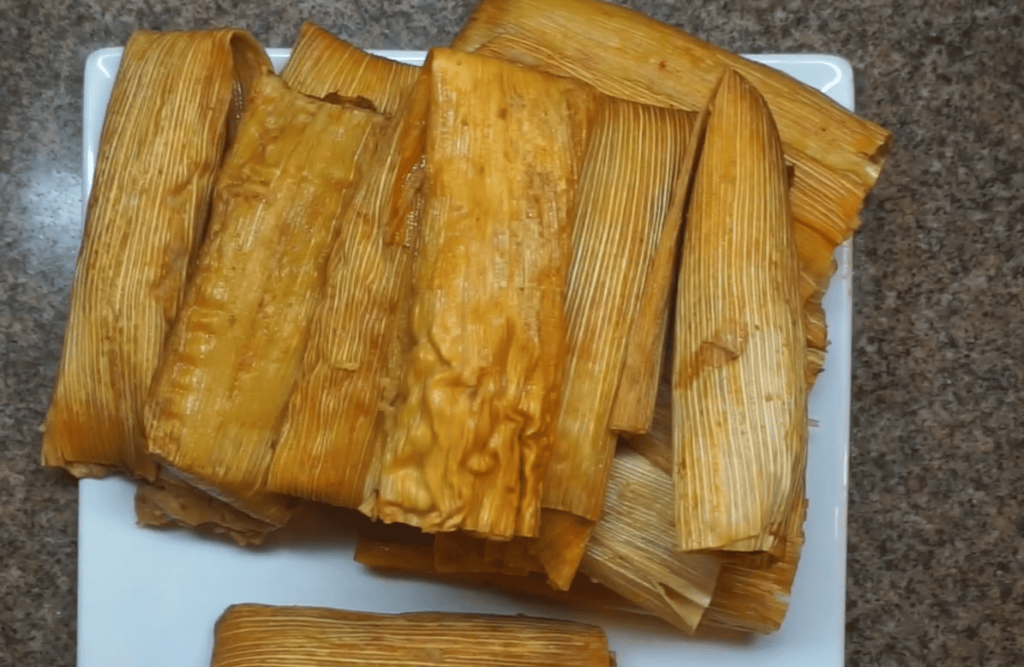
Test doneness by removing one bundle with tongs. Let it rest for 3 minutes. If the husk peels away cleanly, they’re ready. If the masa sticks, steam for another 10-15 minutes.
| Steaming Factor | Ideal Setup | Common Mistake | Result Impact |
|---|---|---|---|
| Water Level | 1/3 pot height | Too high touching basket | Soggy bottom masa |
| Tamale Position | Vertical, open-end up | Laying horizontally | Filling leakage |
| Steam Intensity | Gentle, consistent | Rapid boiling | Tough texture |
| Doneness Test | Husk release check | Visual guess only | Undercooked center |
Vegetarian Tamales: Authentic & Delicious
Honoring traditional methods while adapting for modern diets is the heart of creating authentic plant-based versions. The goal is to capture the soul of classic recipes using thoughtful substitutions.
This approach ensures everyone can enjoy these cherished bundles.
Tips from Traditional Recipes
Classic recipes rely on lard for its unique ability to create a tender, flavor-rich masa. For a vegetarian version, butter is the best substitute. It provides a similar richness and a lovely creamy note.
One non-negotiable tip is to whip your chosen fat until it’s light and nearly doubled in volume. This step is crucial for the signature fluffy texture, regardless of which ingredient you use.
Substituting Ingredients for Vegan Variations
To make vegan vegan tamales, solid fats like vegetable shortening or refined coconut oil are excellent. They replicate the essential texture of traditional vegan tamales.
If using liquid vegetable oil, you may need a slightly different ratio. Ensure extra whipping time to incorporate enough air.
For the filling, simply omit dairy cheese or use a plant-based alternative. Boost flavor with rich fillings like seasoned black beans or mushrooms simmered in a traditional red chile salsa.
Creating delicious vegetarian tamales and vegan tamales is a beautiful way to continue the tradition of sharing food with everyone at your table.
Optimizing Your Recipe: Tips and Variations
Once you’ve mastered the basic technique, a world of flavor possibilities opens up for customizing your creations. This is where you can truly make these dishes your own.
Customizing with Different Fillings and Spices
Experiment with roasted sweet potato and caramelized onion for a sweet-savory combination. Green chile with various cheese options creates classic appeal. Try jack, cheddar, or Oaxacan cheese for different textures.
For heartier options, refried beans mixed with vegan cheese provide protein richness. Spice blends offer another customization layer. Add chipotle powder for smokiness or increase cumin for earthiness.
The best recipes are those you make your own through thoughtful experimentation.
Incorporating Flavor-Boosting Sides
Enhance your meal with complementary sides that elevate the overall experience. Consider traditional Mexican accompaniments that balance the masa’s richness.
Fresh salsas, guacamole, or Mexican rice create a complete dining experience. These sides add contrasting textures and flavors that make each bite more exciting.
| Filling Type | Flavor Profile | Best Cheese Pairing | Spice Recommendation |
|---|---|---|---|
| Sweet Potato & Onion | Sweet & Savory | Queso Fresco | Cinnamon & Cumin |
| Green Chile | Spicy & Creamy | Jack Cheese | Mexican Oregano |
| Refried Beans | Hearty & Earthy | Vegan Cheese | Chipotle Powder |
| Roasted Poblano | Smoky & Rich | Queso Panela | Garlic Powder |
Remember to use about ¼ cup of filling per bundle. Adjust salt to taste as different cheese varieties vary in saltiness.
Serving Suggestions and Storing Leftovers
Proper storage techniques ensure your culinary efforts continue to delight for weeks to come. These handcrafted bundles taste wonderful straight from the corn husk, but pairing them with traditional accompaniments creates a complete feast.
Pairing with Sauces and Traditional Mexican Sides
Fresh pico de gallo adds bright acidity, while salsa verde brings tangy heat. Mexican crema or sour cream provides cooling richness.
Classic sides include creamy refried beans and Mexican street corn. For beverages, consider champurrado or hot chocolate during cooler months.
Special occasions call for festive pairings like Mexican Christmas punch. These combinations elevate your meal into a true celebration.
Freezing, Reheating, and Storage Tips
Your creations freeze beautifully for future enjoyment. Allow them to cool completely after steaming before storage.
For refrigerator storage, use an airtight container for 5-7 days. Freezer-safe bags preserve quality for up to 3 months.
Thaw frozen bundles overnight in the refrigerator. Reheat by steaming for 15-20 minutes or using a skillet method with a little water.
Avoid microwave reheating—it compromises texture. The stovetop methods maintain that perfect tender consistency you worked so hard to achieve.
Conclusion
The rewarding experience of crafting your own authentic corn-husk wrapped creations is now within your reach. You’ve gained the confidence to make tamales that honor centuries of tradition while adapting to modern preferences.
Remember the key elements: properly whipped masa that passes the float test, well-soaked corn husks, and flavorful fillings. Don’t worry about perfect shapes—even rustic bundles taste amazing when the ingredients are well-prepared.
This recipe allows for endless creativity. Try different fillings or adapt it completely using vegetable broth and plant-based fats. Consider hosting a gathering where everyone helps with assembly—it makes the process more enjoyable.
Your masa harina and corn husks await. The aromas filling your kitchen and that first delicious bite will make every moment worthwhile. You’re now part of a beautiful culinary tradition!