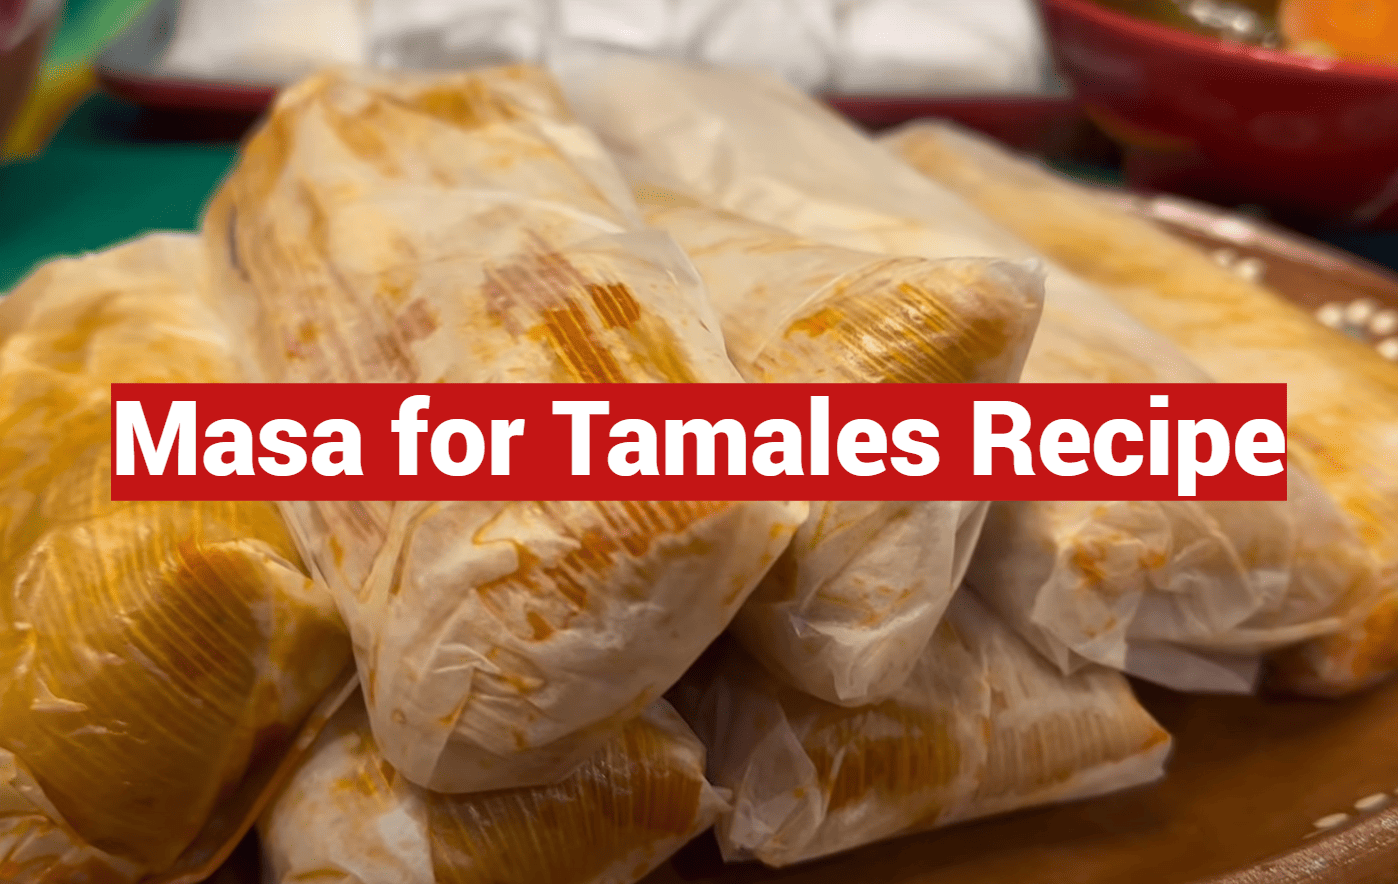
Did you know Mexican families often prepare 300-500 tamales during Christmas season? This labor of love transforms kitchens into assembly lines where generations bond over steaming pots. At the center lies masa – the seasoned corn dough that makes or breaks every bite.
Creating perfect masa requires more than mixing ingredients. It’s about honoring traditions while adapting to modern kitchens. Most home cooks use Maseca brand corn flour, available at major retailers like Target, but the real magic happens when balancing moisture, fat, and seasoning.
Oil has become a popular alternative to lard for lighter texture without sacrificing tenderness. The ideal dough should feel like moist playdough – firm enough to hold fillings yet soft enough to spread smoothly on corn husks. Get this right, and you’ll create tamales that peel away cleanly, revealing fluffy layers that melt in your mouth.
This guide unlocks both time-tested techniques and smart shortcuts. You’ll learn why proper dough consistency prevents tearing during steaming, how to season for balanced flavor, and methods to scale recipes for large gatherings. Whether continuing family customs or starting new ones, mastering masa turns every batch into edible love letters.
Key Takeaways
- Tamale dough forms the foundation for authentic texture and flavor
- Maseca corn flour delivers consistent results for home cooks
- Oil creates lighter masa than traditional lard options
- Proper dough moisture prevents sticking during assembly
- Seasoning balance enhances fillings without overpowering them
Introduction to Masa and Tamales
In Mexican kitchens, the rhythmic pat of dough against corn husks signals more than meal prep—it’s a cultural heartbeat. These steamed bundles carry stories in every fold, connecting modern tables to ancestral wisdom passed through generations.
What Makes This Dish Special
At its core, this recipe combines three elements: seasoned corn dough, flavorful fillings, and natural wrappers. The dough acts like edible glue—holding ingredients together while absorbing savory juices during steaming. Traditional versions use fresh-ground corn soaked in limewater, but most home cooks now use instant corn flour for convenience.
Texas restaurateur Jesusita demonstrated this balance in the 1930s. Rising before dawn, she transformed dried kernels into pliable dough using a stone metate, proving great food demands both effort and love. Today’s versions maintain that spirit through shared kitchen moments and adapted techniques.
More Than Just a Meal
Preparing these treats transforms kitchens into time machines. Grandmothers teach grandchildren how to spread dough evenly—thick enough to hold shape, thin enough to steam properly. Holiday gatherings become living archives where measuring cups mix with family lore.
“We don’t just make food—we stir memories into every batch.”
Communities bond over shared tasks: soaking husks, simmering meats, and folding packets. Each step honors heritage while inviting personal twists, ensuring traditions evolve without losing their soul.
Essential Ingredients and Equipment
Every great dish begins with its building blocks—the right components transform simple recipes into memorable meals. Let’s explore what turns corn flour into pillowy-soft dough and identify tools that simplify large-batch preparation.
Key Ingredients Explained
Masa harina forms the backbone of authentic dough. This specially treated corn flour absorbs liquid evenly, creating a pliable base. Choose brands like Maseca for consistent results.
Fat options split kitchens: lard delivers rich flavor, while oils create lighter textures. Baking powder lifts the dough during steaming, preventing dense results. Salt amplifies corn’s natural sweetness, and warm broth binds everything while adding depth.
Must-Have Kitchen Tools
A sturdy mixer saves elbow grease when preparing multiple batches. Use the flat beater attachment to incorporate fat evenly. For small quantities, a wide bowl and clean hands work beautifully—many cooks swear by this tactile method.
| Ingredient | Purpose | Options |
|---|---|---|
| Masa harina | Base texture | Maseca, Bob’s Red Mill |
| Fat | Moisture & tenderness | Lard, canola oil |
| Broth | Flavor carrier | Chicken, vegetable |
Keep measuring cups nearby—precision matters most with baking powder. Too little creates crumbly dough; too much leaves a metallic aftertaste. For holiday gatherings, stock extra corn husks and steamers to keep production flowing smoothly.
Understanding Masa Harina and Fresh Masa
Nixtamalization – an ancient corn treatment method – separates authentic dough from ordinary cornmeal. This alkaline process unlocks nutrients while creating masa’s signature earthy aroma. Modern cooks choose between two foundations: versatile masa harina flour or fresh-ground corn paste.
Corn Flour vs Stone-Ground Tradition
Masa harina (literally “dough flour”) starts as dried hominy – corn soaked in limewater. Producers grind it into shelf-stable powder that hydrates beautifully. Fresh versions use stone-ground nixtamal corn, offering richer flavor but requiring refrigeration.
| Feature | Masa Harina | Fresh Masa |
|---|---|---|
| Preparation Time | 5 minutes mixing | Ready-to-use |
| Shelf Life | 12+ months | 3-5 days chilled |
| Texture | Consistent results | Artisan variation |
Finding Authentic Ingredients
Look for the white-bagged Maseca brand in grocery aisles – its neutral flavor adapts to any recipe. Latin markets stock fresh dough labeled “sin preparar” (unprepared) with an “S” code. Avoid pre-seasoned versions for full control over flavors.
Major retailers like Walmart now carry masa harina, while fresh options shine at tortillerías. As Abuelita Maria advised: “Good dough needs three things – patience, quality corn, and happy hands.”
Step-by-Step Guide to Making Masa
The magic begins when your fingers sink into the corn flour, transforming simple ingredients into pliable dough. This tactile process bridges ancient techniques with modern kitchens, rewarding patience with perfect texture.
Mixing Dry Ingredients
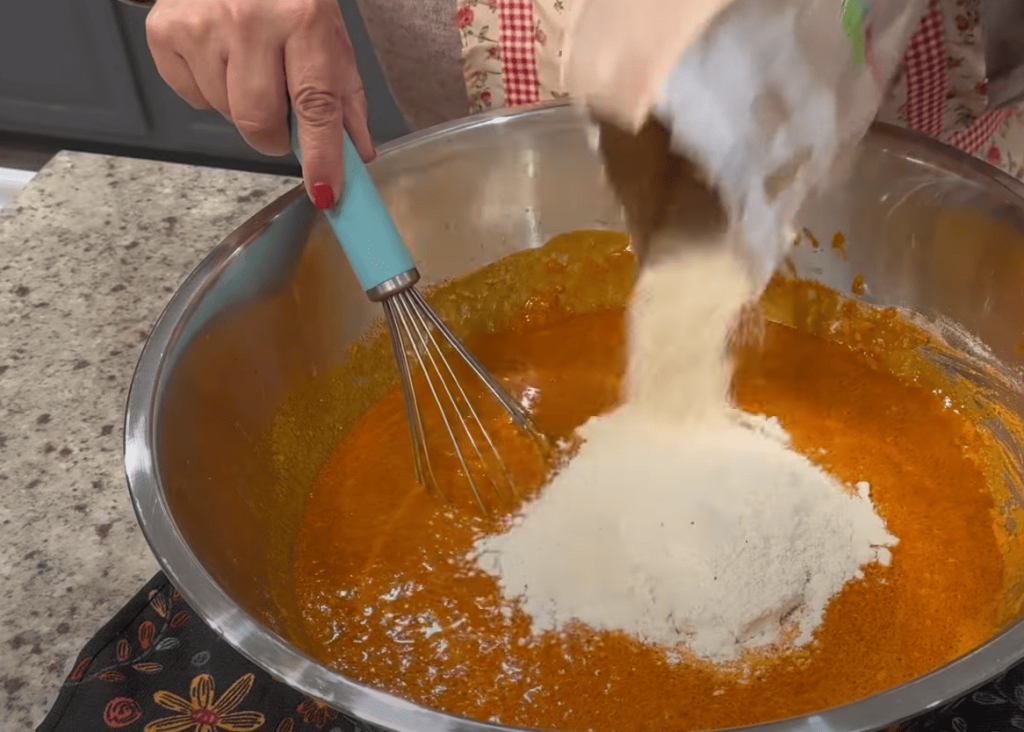
Start with a wide bowl. Combine 2 cups masa harina, 1 tsp salt, and 1/2 tsp baking powder. Whisk thoroughly—uneven mixing causes bland spots. Think of it as seasoning every grain.
Incorporating Fat and Broth
Add 2/3 cup oil. Squeeze the mixture through your fingers until it clumps like damp sand. Slowly pour 1.5 cups warm broth while kneading. Aim for 3-5 minutes of mixing—the dough should slap the bowl softly when ready.
| Stage | Texture Check | Action Needed |
|---|---|---|
| Dry Mix | Powdery, no lumps | Whisk 30 seconds |
| After Fat | Crumbly, holds shape | Add broth slowly |
| Finished | Thick hummus | Rest 15 minutes |
Achieving the Perfect Texture
Test by spreading a spoonful on a corn husk. Ideal dough stays put without cracking. Too sticky? Add more flour. Too dry? Mist with broth. Pro tip: Let it rest 15 minutes—hydration evens out naturally.
“Good masa whispers when you spread it—no tearing, no fighting.”
Trust your hands here. The right consistency means steamed bundles peel away cleanly, revealing tender layers worth the effort.
Using Canola Oil, Lard, and Other Fats
Your choice of fat transforms corn dough from simple to sublime. This decision shapes texture, health impact, and cultural authenticity in every bite. Modern kitchens balance tradition with dietary needs through smart substitutions.
Flavor and Health Considerations
Lard delivers airy, fluffy results cherished in traditional recipes. Its rich flavor carries ancestral wisdom but packs more saturated fat. Many home cooks now opt for neutral oils like canola or vegetable alternatives.
| Fat Type | Texture | Flavor | Best For |
|---|---|---|---|
| Lard | Light & fluffy | Rich, earthy | Authentic recipes |
| Canola Oil | Tender & soft | Neutral | Health-conscious cooks |
| Vegetable Shortening | Flaky layers | Mild | Vegan versions |
Canola oil reduces saturated fat by 60% compared to lard while maintaining workable dough. Chef Elena Martínez notes: “The right fat shouldn’t fight your fillings—it should make them shine.”
Vegetable shortening mimics lard’s texture without animal products. Its blank canvas lets spices and broths take center stage. Whatever you choose, ensure fats are room temperature for smooth blending.
Key tips for success:
- Whip fats thoroughly until mixture resembles wet sand
- Balance flavor carriers (like broth) with neutral oils
- Test dough consistency before assembling
Masa for Tamales: Detailed Recipe and Variations
Mastering this corn-based foundation means understanding how ingredient ratios shape texture. Whether honoring ancestral methods or embracing contemporary twists, precision separates good results from exceptional ones.
Traditional vs. Modern Techniques
The classic approach starts with 2 cups whipped lard. Beat it 60 seconds until fluffy peaks form – this aerates the fat for lighter dough. Combine with 8¾ cups masa harina, 1¾ tablespoons salt, and 1 tablespoon baking powder. Slowly mix in 8 cups broth until the mixture resembles thick cake batter.
Health-conscious cooks favor oil-based versions. Use 1¾ cups canola oil with 8¼ cups masa harina and 7 cups broth. Chef Rosa Marquez explains:
“Oil skips the whipping step but still delivers tender layers when steamed properly.”
| Method | Fat Quantity | Broth | Texture |
|---|---|---|---|
| Traditional | 2 cups lard | 8 cups | Airy & rich |
| Modern | 1¾ cups oil | 7 cups | Soft & neutral |
Three tips for success:
- Measure dry ingredients precisely – use leveled cups
- Test dough consistency before assembling
- Adjust broth temperature (warm blends better)
Both approaches yield 45-50 portions. The recipe scales linearly – double quantities for holiday feasts or halve for weeknight meals. Choose your path, but remember: great tamales begin with balanced masa dough.
Scaling and Adjusting the Recipe
Creating enough dough for 100 holiday bundles? Smart scaling keeps traditions alive without kitchen chaos. The secret lies in precise math and workflow planning—because nobody wants exhausted arms before assembly begins.
Making Large Batches
Double the recipe needs 16½ cups masa harina—exactly one 4.4-pound Maseca bag. Split mixing into two rounds to protect your mixer’s motor. Chef Isabella Gomez advises:
“Treat big batches like relay races—pass the bowl between helpers to keep energy high.”
| Ingredient | Single Batch | Double Batch |
|---|---|---|
| Corn Flour | 8¼ cups | 16½ cups |
| Canola Oil | 1¾ cups | 3½ cups |
| Broth | 7 cups | 13 cups |
Doubling for Special Occasions
Prep stations prevent bottlenecks. Set up separate areas for:
- Mixing dry ingredients
- Combining fats and broth
- Testing dough consistency
Use shallow containers to store prepared dough—deep bowls make scooping messy. Keep extra husks and fillings within reach to maintain your assembly line’s rhythm. Remember: joy multiplies when shared, but dough quantities need careful calculation.
Testing and Adjusting Masa Consistency
A small bowl of water holds the secret to flawless dough. Getting the texture right determines whether your bundles steam into cloud-soft delights or dense disappointments. Let’s explore two game-changing techniques every cook should master.
Performing the Float Test
Drop a teaspoon-sized piece into a cup of warm water. If it floats, you’re golden! Sinking means your mixture needs more fat. Beat in 1 tablespoon oil or lard for 60 seconds, then retest. This trick reveals if your dough traps enough air for light results.
| Test Result | Solution | Time Needed |
|---|---|---|
| Floats immediately | Ready to use | 0 minutes |
| Sinks slowly | Add ½ tbsp fat | 1 minute mixing |
| Sinks quickly | Add 1 tbsp fat + whip | 2 minutes mixing |
Troubleshooting Common Issues
Dough crumbling? Mix in broth 1 tablespoon at a time. Sticky fingers? Work in extra corn flour. Chef Linda Cortez advises:
“Adjust like you’re tuning a guitar – small twists create harmony.”
Remember these fixes:
- Too dry: Add liquid in 15-second intervals
- Too wet: Sprinkle flour while kneading
- Grainy texture: Rest dough 10 minutes
Perfecting this step takes practice, but nailing it means tender results every time. Keep that water bowl handy – it’s your tastiest science experiment yet!
Assembling and Steaming Tamales
The final stretch turns prepared ingredients into edible treasures. Like wrapping gifts, this stage combines precision with creative flair—each bundle becomes a surprise package awaiting discovery.
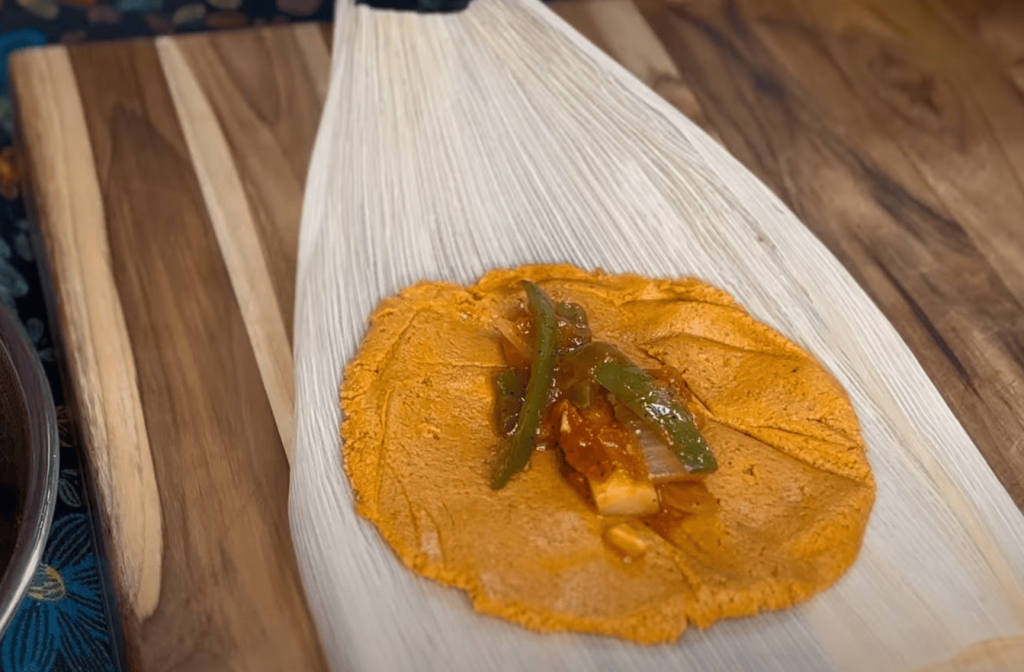
Spreading Masa on Corn Husks
Lay soaked husks flat with the smooth side up. Spread 2 tablespoons of dough into a rectangle, leaving 2-inch borders. This creates space for folding magic. Center 1½ tablespoons of shredded chicken or pork filling—the sweet spot between overstuffed and skimpy.
Fold like a pro: bring husk sides together first, then tuck the pointed end upward. Secure with kitchen string or a snug fold. Proper wrapping prevents leaks while letting steam work its wonders.
Steaming Techniques Explained
Stand bundles upright in your steamer—they’ll expand like happy accordions. Keep water levels halfway up the pot, replenishing as needed. After 2½ hours, test one: the husk should peel away cleanly from tender dough.
Pro tip: Place a coin at the pot’s bottom. Its rattle signals when to add more water. Share stories while waiting—the best recipes always include laughter simmering alongside dinner.