Did you know that over six million pounds of masa harina are sold annually in the U.S., with a single brand dominating most home kitchens? This incredible corn flour is the secret behind countless family feasts.
Welcome to your new favorite guide for creating that perfect foundation. Whether you’re a first-timer or a seasoned pro, this reliable formula is your ticket to success. You’ll achieve a soft, fluffy texture that makes every bite memorable.
This guide focuses on a classic, versatile base. It works wonderfully for both savory and sweet creations. You can use traditional pork or explore creative vegetarian options.
Best of all, the ingredients are simple and easy to find at most grocery stores. We’ll even cover modifications for different diets. The method includes a clever test to ensure your mixture is perfectly prepared before assembling.
Key Takeaways
- This guide provides a reliable method for creating an authentic base for homemade masa.
- The formula is designed for both beginners and experienced cooks seeking consistent results.
- Mastering this foundation is the most important step for delicious final products.
- The base is incredibly versatile, suitable for a wide range of fillings from meat to vegetables.
- It uses common, accessible ingredients with options for vegan and vegetarian adaptations.
- The yield is generous, perfect for family gatherings or preparing meals for the week.
- A simple test is included to guarantee your mixture has the ideal consistency.
Introduction
Family kitchens across Latin America have long been centers for creating corn-based specialties that bring people together. This tradition of preparing masa for special occasions represents a beautiful culinary heritage.
Overview of Traditional Tamale Dough
The foundation of authentic tamales begins with perfectly prepared masa. This corn dough must achieve a delicate balance of texture and moisture.
It should be soft and spongy to properly envelop the filling. The right consistency ensures each tamal cooks evenly and delivers flavor beautifully.
The Story Behind Authentic Recipes
Traditional methods often involved measuring ingredients “al tanteo” – by feel and experience. Grandmothers would use their hands or favorite household items instead of precise cups.
In Spanish, the singular is “tamal” and plural is “tamales,” though English speakers commonly use “tamale” for both. This post helps modern cooks achieve consistent results while honoring tradition.
Understanding these basics gives you confidence to make tamales your own family will love. You’ll be ready to create memories around the kitchen table.
Key Ingredients for Authentic Tamale Dough
Every great masa starts with quality ingredients that work in harmony to create the perfect consistency. Understanding each component’s role helps you achieve that light, fluffy texture everyone loves.
Masa Harina and Its Role
Masa harina forms the essential foundation of your masa. This special corn flour comes from nixtamalized corn kernels called hominy. The process gives masa harina its distinctive flavor and gluten-free properties.
When mixed with liquid, this dehydrated harina reconstitutes into soft, pliable dough. Fresh masa harina makes a noticeable difference in your final product’s quality.
Selecting the Perfect Fat
The right fat creates that irresistible light texture. Traditional pork lard provides rich flavor and excellent fluffiness. It’s the classic choice for authentic results.
For dietary preferences, vegetable shortening works wonderfully. It mimics lard’s texture while offering neutral taste. Oils like avocado or olive can also serve as fat alternatives.
Each ingredient contributes to the perfect balance. Quality choices elevate your masa from good to exceptional.
Understanding Masa Harina and Maseca Differences
The secret to perfect masa lies in selecting the right type of specially treated corn flour. Understanding these differences ensures your final product has authentic texture and flavor.
What is Masa Harina?
Masa harina undergoes an ancient process called nixtamalization. Corn kernels soak in an alkaline solution to remove hulls and boost nutrition. This treatment gives the flour its distinctive taste and cooking properties.
This special harina differs from regular cornmeal or corn starch. It’s not the same as precooked corn flour used for arepas. The nixtamalization creates a unique corn masa that hydrates beautifully.
How Popular Brands Stand Out
The most common brand offers both regular and specialty versions. The regular masa harina has a fine grind ideal for tortillas. The coarser tamal version creates a more textured result.
Other quality brands include Bob’s Red Mill and King Arthur. Premium options like Masienda use heirloom corn for distinct flavors. Blue corn harina offers earthy notes but is less common.
Both regular and specialty masa harina work excellently for your tamale preparation. Choose based on your texture preference and local availability.
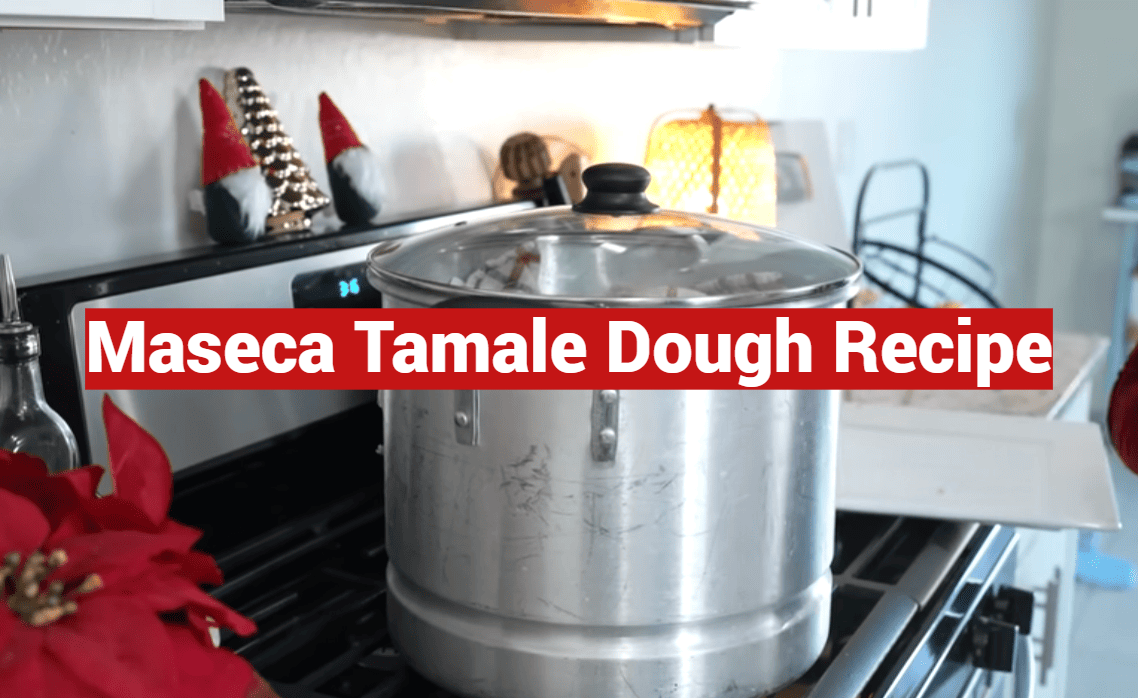
Maseca Tamale Dough Recipe
This carefully tested formula eliminates guesswork and delivers a light, fluffy texture ideal for traditional preparations. Follow these exact proportions for consistent results every time.
| Ingredient | Quantity | Notes |
|---|---|---|
| Masa harina | 4-6 cups | Adjust for batch size |
| Lard or shortening | 1-1.5 cups | Room temperature |
| Broth or stock | 3-4 cups | Warm, not hot |
| Salt | 1 teaspoon | Fine grain |
| Baking powder | 1 teaspoon | Optional for lift |
This preparation yields approximately 35-45 portions depending on husk size. All ingredients should be at room temperature for proper texture. Cold fat won’t whip correctly, while hot liquid can cause separation.
Choose your broth based on filling preferences. Chicken works well with poultry, pork complements carnitas, and vegetable broth suits plant-based versions. Some cooks add about ¾ cup of sauce directly to the masa for flavor continuity and color.
Optional seasonings like garlic powder, onion powder, or cumin elevate the masa from bland to flavorful. Remember, you enjoy the entire preparation, not just the filling inside.
Step-By-Step Preparation Process
The transformation from simple ingredients to perfect masa begins with a careful, methodical approach. Following each step in order ensures your final mixture achieves the ideal consistency.
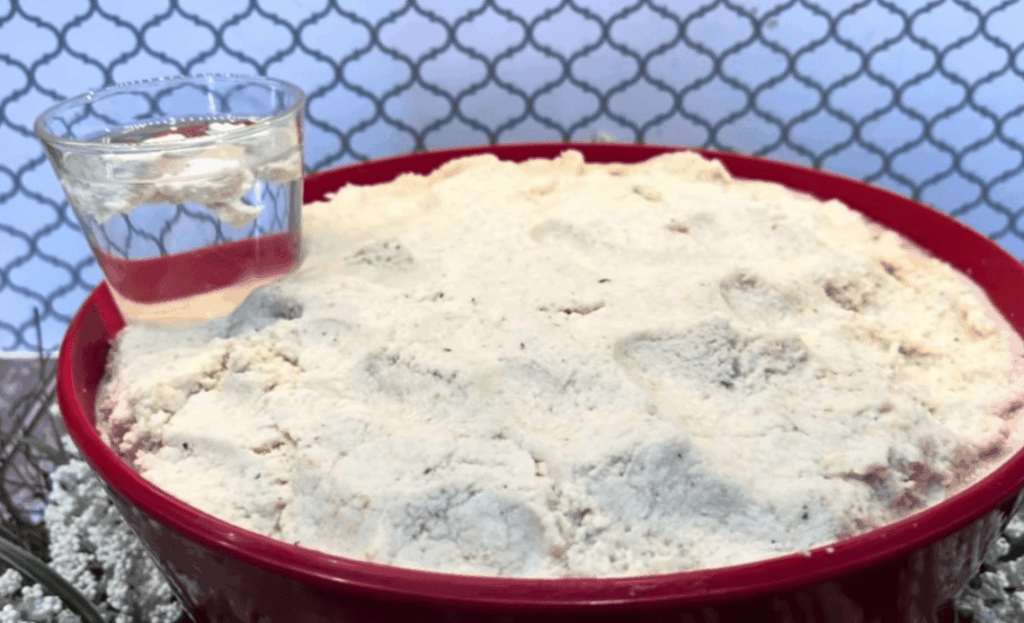
Mixing Dry Ingredients and Seasonings
Start by whisking together your masa harina, baking powder, salt, and any seasonings in a large bowl. This initial step prevents pockets of concentrated baking powder or salt.
Even distribution is crucial for consistent flavor and texture throughout your preparation. Use a wire whisk for the best results.
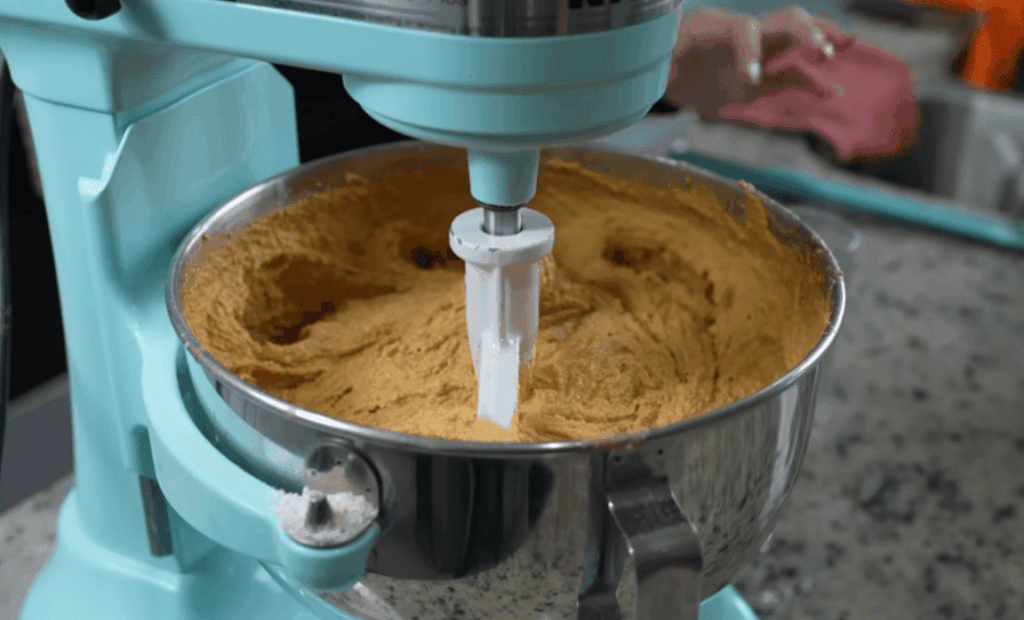
Incorporating Lard and Liquid Gradually
In a separate bowl, beat the lard until it transforms. This process takes about 20 minutes by hand or 8 minutes with an electric mixer.
You’ll know it’s ready when it becomes white, light, and fluffy. Add half the dry mixture to create a wet sand texture.
Next, incorporate one cup of broth while mixing continuously. Add the remaining flour mixture followed by another cup of broth.
Gradually add the remaining liquid until you achieve a soft, spreadable consistency. The entire mixing process takes 30-35 minutes by hand or 15-20 minutes with a mixer.
Let the mixture rest for 15-20 minutes. This allows the masa harina to fully hydrate before you assess the final texture.
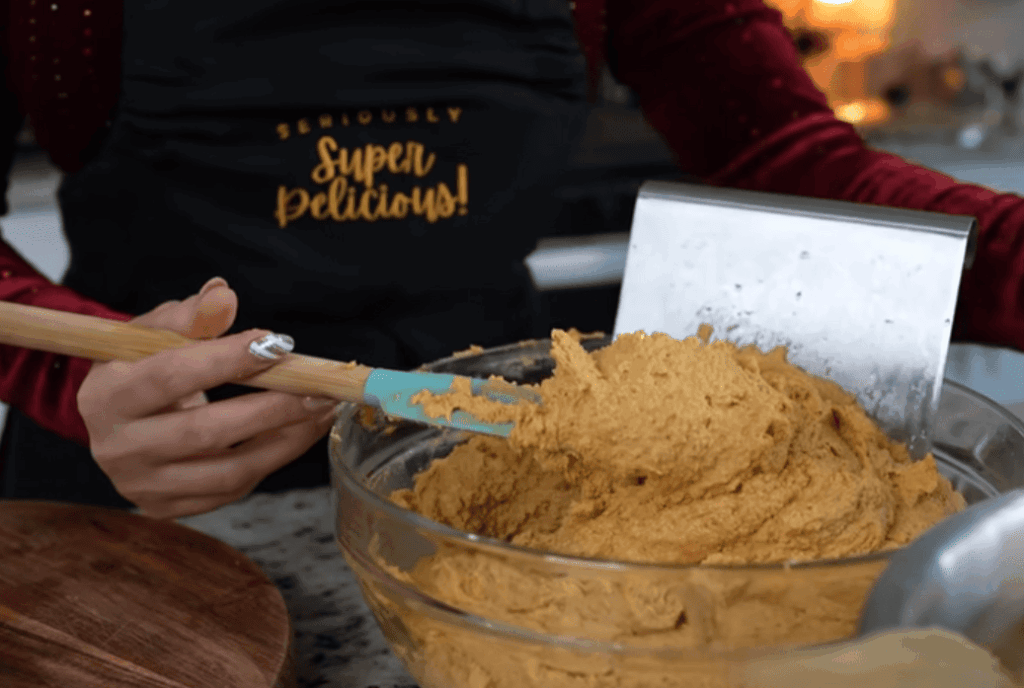
Achieving the Perfect Consistency
Getting the texture just right is the final, crucial step in preparing your masa. The ideal consistency ensures it spreads easily and cooks properly. Think of it as the difference between a good result and a great one.

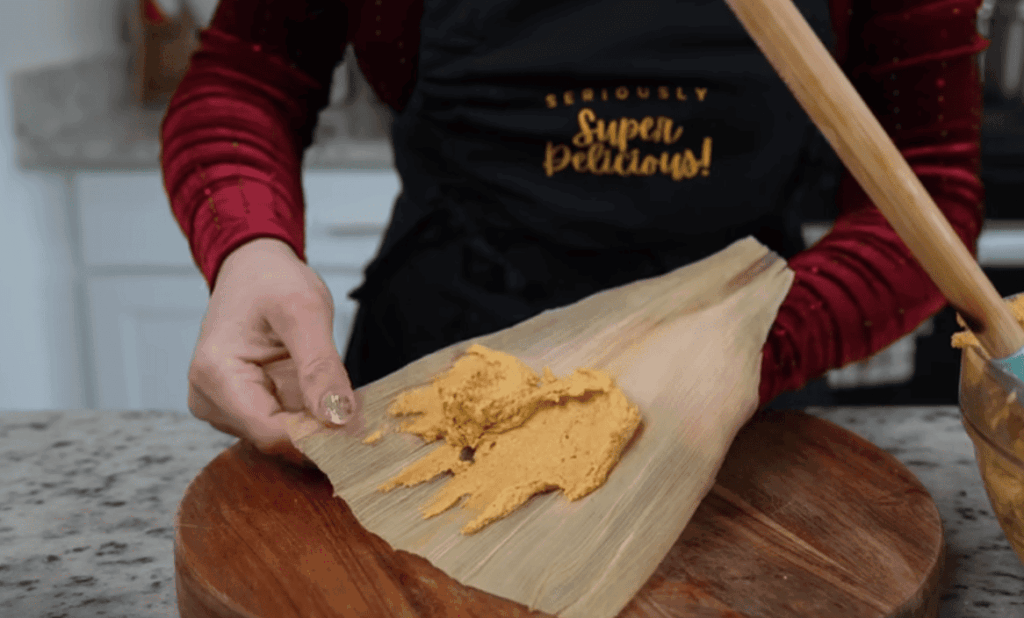
Your finished mixture should look like soft peanut butter or thick hummus. It needs to be spreadable with a spoon but hold its shape on a corn husk. This perfect texture is not runny or too stiff.
The Float Test Explained
The traditional way to check readiness is the float test. Take a small ball of your masa and drop it into a glass of cold water.
If it floats, your mixture has enough air and is ready to use. If it sinks, it needs more work. Simply mix for another five minutes and add a tablespoon of broth.
Test it again after this short time. Many families trust this method, but the most important sign is a light, airy masa.
Personal preference also plays a role. Some cooks like a firmer dough they can spread with their hands. Others prefer a looser consistency that flows smoothly from a spoon.
Remember, the masa will firm up a bit as it rests. If you are not assembling right away, you may need to add a little more liquid later to regain the perfect texture.
| Texture Preference | Liquid Amount | Spreading Method |
|---|---|---|
| Firmer | Less broth | Hands |
| Softer | More broth | Spoon |
| Ideal (Peanut Butter) | As per recipe | Either |
Variations for Vegan and Non-Vegan Options
Whether you’re cooking for vegan guests or sticking with classic preparations, simple ingredient swaps can transform your masa to suit any diet. The foundation remains wonderfully adaptable while maintaining that essential light texture.
Using Vegetable Shortening or Oils
For plant-based versions, replace traditional lard with equal amounts of vegetable shortening. This fat alternative mimics the rich texture beautifully. You can also use about one cup of neutral vegetable oil instead.
Oil-based mixtures may need slightly less liquid since oil doesn’t absorb like solid fat. For extra flavor, try frying sliced onions in vegetable oil until golden. Cool completely before adding to your preparation.
Adapting Broth Choices for Different Diets
Selecting the right broth ensures flavor harmony with your fillings. Vegetable stock works perfectly for plant-based options. For traditional versions, match your broth to the main ingredient.
Use chicken broth with poultry fillings, pork broth for carnitas, or beef broth for carne preparations. This creates a cohesive taste experience from the first bite.
Tips and Tricks for Flavorful Tamale Dough
Seasoning your masa properly transforms it from a simple base to the star of your culinary creation. Many cooks focus only on the filling, but the masa deserves equal attention. Well-seasoned masa makes all the difference between bland and delicious results.
Seasoning Adjustments for Enhanced Taste
Start with essential seasonings like garlic powder for savory depth. Add onion powder for sweetness and complexity. Ground cumin provides that authentic Mexican flavor profile.
For incredible flavor continuity, mix ¾ cup of your prepared sauce directly into the masa. This technique also adds beautiful natural color. If you don’t have extra sauce, use the cooking liquid from your meat instead.
Chile powder offers another great option. Use ancho for mild heat or chipotle for medium spice. Habanero powder delivers serious fire for those who enjoy spicy food.
| Seasoning Approach | Flavor Profile | Best For |
|---|---|---|
| Sauce Integration | Rich, Cohesive | Traditional Preparations |
| Chile Powder | Spicy, Smoky | Bold Flavor Lovers |
| Herb & Spice Blend | Complex, Aromatic | All-Purpose Use |
Salt adjustment is crucial. Start with 1 teaspoon since broths vary in saltiness. Taste and adjust before assembling. Remember that some salt flavor diminishes during steaming.
Your masa should taste slightly more seasoned than you think necessary. The flavors will mellow perfectly after cooking. Trust your taste buds and adjust to your family’s preferences.
How to Store and Freeze Tamale Masa
Learning to store and freeze masa correctly gives you the flexibility to prepare in advance. This process saves valuable time when you’re ready to assemble your creations. Proper storage ensures your masa maintains its perfect consistency.
Refrigeration Techniques
Store prepared masa in an airtight container in your refrigerator for up to 48 hours. Press plastic wrap directly on the surface before sealing to prevent drying. This simple step maintains the ideal texture.
Remove the masa from the refrigerator about 30 minutes before use. This allows it to reach room temperature naturally. If the mixture seems too firm, add a few tablespoons of broth and knead gently.
Freezing and Thawing Guidelines
For long-term storage, masa freezes beautifully for 3-6 months. Use freezer bags or vacuum-seal for best results. This is perfect when you want to prep your filling and masa separately.
Thaw frozen masa in the refrigerator overnight. The texture will initially appear wet and crumbly. Don’t worry—this is normal. Let it come to room temperature, then knead to restore spreadable consistency.
While frozen-then-thawed masa won’t be identical to fresh, it’s remarkably similar after proper handling. You’ll still enjoy delicious, fluffy results worth the make-ahead convenience.
Common Mistakes and Troubleshooting
When your homemade creations don’t turn out as expected, these troubleshooting tips will help you identify and fix the problems. Most issues have simple solutions that will improve your results.
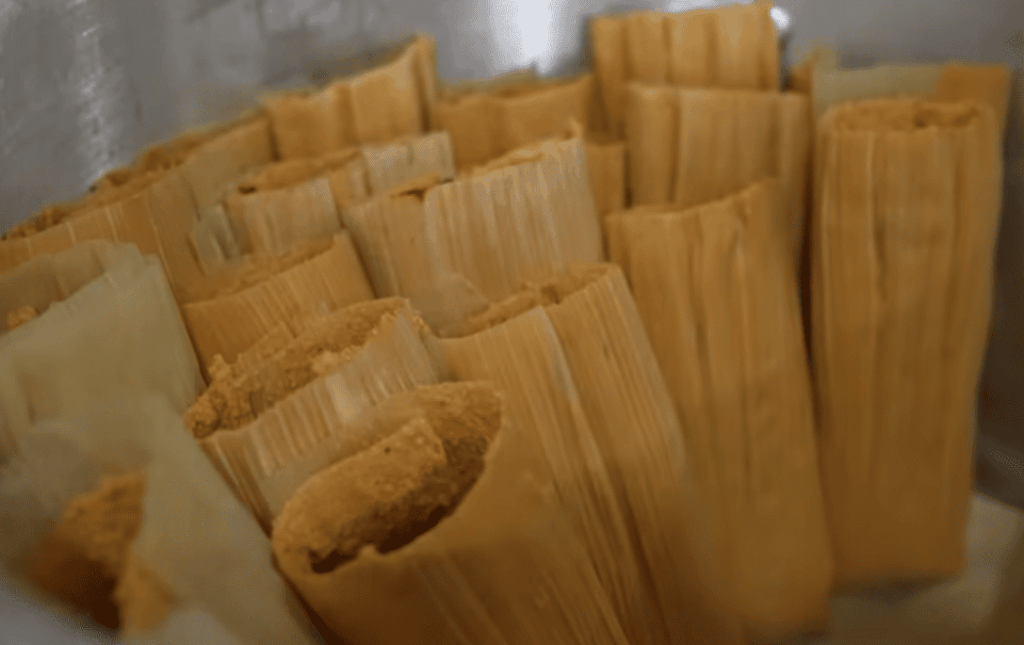
The most common complaint is tamales sticking to the husks. This usually means they need more cooking time. Properly cooked tamales pull away cleanly from the corn husk.
Start checking at 60 minutes. Continue steaming in 15-30 minute increments if they’re still sticking. The mixture should release easily when done.
Dense, heavy results often come from insufficient whipping of fat. Not enough liquid or over-packing the husks can also cause this issue. Your masa should be light and fluffy.
Dry, coarse texture indicates you need more fat or broth. Add small amounts and mix thoroughly. The opposite problem—tamales falling apart—means too much liquid was used.
Uneven cooking creates dense spots in your masa. This happens when the mixture isn’t thoroughly combined. Using a mixer ensures even distribution for large batches.
| Common Issue | Likely Cause | Quick Fix |
|---|---|---|
| Sticking to Husks | Undercooked | Extend steaming time |
| Dense Texture | Insufficient whipping | Beat fat longer |
| Dry Masa | Not enough liquid/fat | Add broth gradually |
| Falling Apart | Too much liquid | Add more masa harina |
| Uneven Cooking | Poor mixing | Use mixer for large batches |
Always use warm broth, not hot. Hot liquid causes fat separation. This creates greasy masa with poor consistency. Your final dough should be smooth and spreadable.
Working by hand gives you better control for small batches. For larger quantities, a mixer saves time and ensures thorough blending. Both methods can produce excellent results.
Serving Suggestions and Tamale Fillings Ideas
Now for the best part—choosing delicious fillings to wrap in your perfectly prepared masa. The right filling turns your creation into a memorable meal.
Classic options are always a hit. Think tender shredded chicken in a red or green sauce. Or try savory pork carnitas for a rich flavor.
Vegetarian fillings can be just as satisfying. Black beans with roasted vegetables offer great fiber. Sautéed mushrooms provide a hearty, plant-based protein.
Don’t forget sweet possibilities! The same masa base works for dessert. Fill it with pineapple or strawberries for a special treat.
These handheld delights are perfect any time of day. Enjoy them for breakfast with a coffee. Serve them for dinner with Mexican rice and beans.
| Filling Type | Key Ingredients | Best Serving Occasion |
|---|---|---|
| Classic Meat | Shredded chicken, pork carnitas | Family gatherings, holidays |
| Vegetarian | Black beans, roasted peppers, cheese | Weeknight dinners, potlucks |
| Sweet Dessert | Pineapple, cajeta, strawberries | Dessert, special celebrations |
One of the best features is their freezer-friendly nature. Cook a large batch and freeze some for later. You can enjoy homemade tamales weeks after you make them.
Conclusion
With this reliable method now in your cooking arsenal, you’re ready to create memorable meals for any occasion. You’ve learned the essential foundation that will serve you well for countless batches of delicious homemade tamales.
Remember that practice truly makes perfect. Your first attempt to make masa might not be flawless, but each time you make tamales, your intuition for the right consistency will grow. Trust this recipe while also adjusting flavors to suit your family’s tastes.
The joy of serving tamales you created from scratch is incredibly satisfying. Once comfortable with the basics, experiment with different fats or use a mixer for larger gatherings.
Embrace this wonderful tradition and consider starting your own family ritual. Gathering to make masa together creates special memories that last far beyond the meal itself.