Did you know that over 90% of home cooks who attempt traditional Mexican dishes rate the sauce as the most challenging—yet most rewarding—component to master? This single element can elevate your entire meal from ordinary to extraordinary.
Welcome to your ultimate guide for creating an authentic accompaniment that will transform your homemade creations. We’ll walk you through everything from selecting perfect dried peppers to achieving that ideal balance of smoky, savory, and slightly spicy notes.
Whether you’re preparing traditional pork dishes for family gatherings or experimenting with chicken and beef variations, the right topping makes all the difference. This comprehensive walkthrough gives you flexibility with both traditional Mexican red pepper methods and quicker Tex-Mex alternatives.
You’ll discover essential techniques, ingredient substitutions, storage tips, and creative ways to use your homemade creation beyond just the main dish. By the end, you’ll have the confidence to bring authentic flavors to your dinner table with ease.
Key Takeaways
- Master the foundation of authentic Mexican flavor profiles
- Learn to select and prepare dried peppers for optimal taste
- Discover both traditional and time-saving preparation methods
- Gain confidence with ingredient substitutions and storage techniques
- Expand your culinary skills beyond the main dish application
- Achieve restaurant-quality results in your own kitchen
- Create versatile toppings that enhance multiple dishes
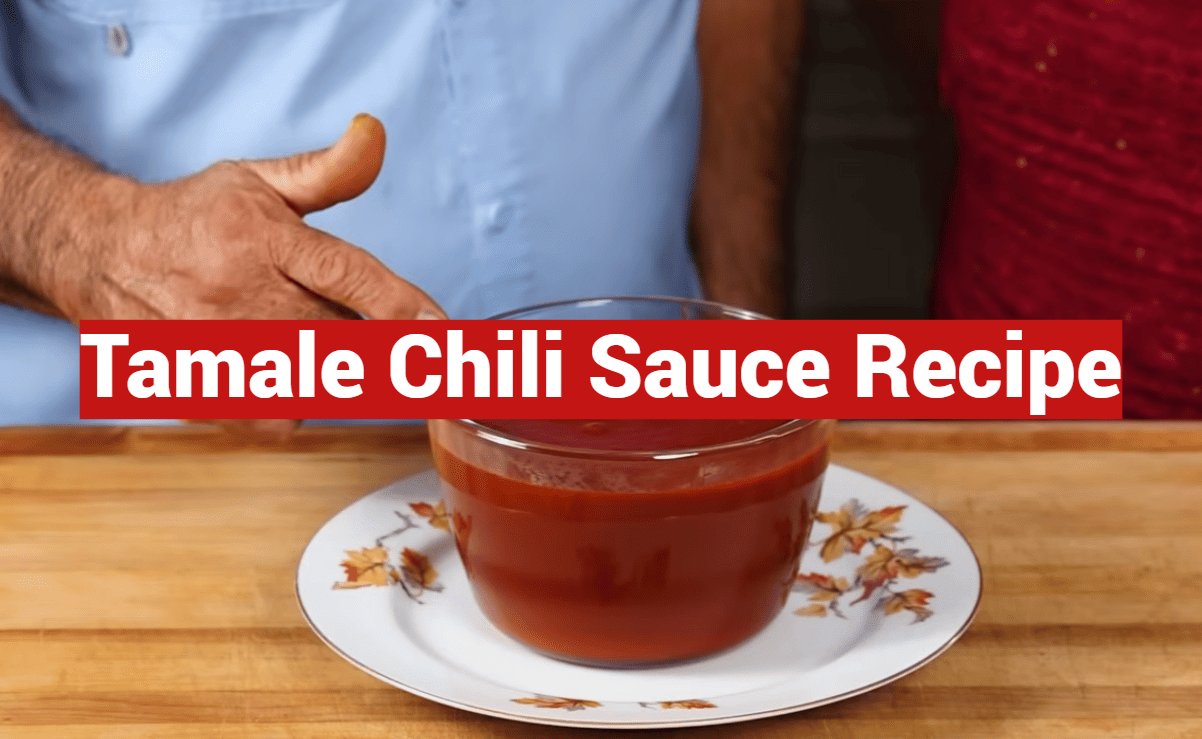
Introduction to a Delicious Tamale Chili Sauce
Imagine transforming basic pantry staples into a complex, layered accompaniment that will elevate your homemade creations to restaurant quality. This journey into authentic Mexican cooking begins with mastering the art of crafting the perfect finishing touch.
A Friendly Welcome to Authentic Mexican Flavors
Creating your own signature topping connects you with generations of culinary tradition. Simple ingredients like dried peppers and spices develop into rich, complex flavor profiles through careful preparation.
When you control the process from start to finish, you tailor every aspect to your family’s preferences. The heat level, smokiness, and texture become exactly what you desire for your favorite dishes.
This approachable recipe breaks down traditional techniques into manageable steps. Home cooks of all skill levels can achieve professional results with confidence and ease.
| Pepper Type | Heat Level | Flavor Profile | Best Preparation |
|---|---|---|---|
| Ancho | Mild | Sweet, fruity, raisin-like | Dry toast then soak |
| Guajillo | Medium | Tangy, berry-like, earthy | Simmer briefly then blend |
| Chipotle | Medium-Hot | Smoky, sweet, tobacco notes | Rehydrate in warm liquid |
| Pasilla | Mild-Medium | Herbal, licorice, rich | Toast lightly before using |
Whether preparing for celebrations or weeknight meals, this versatile recipe adapts to any occasion. The friendly guidance throughout ensures success at every step of your culinary adventure.
The Rich History and Cultural Significance of Tamale Sauces
The story of authentic Mexican cuisine unfolds through the rich, crimson sauce that has graced tamales since pre-Columbian times. Ancient civilizations valued these portable meals for their convenience and nutrition.
Each region developed unique recipes using local ingredients. Family methods passed down through generations created distinctive flavor profiles. The right accompaniment became as important as the masa itself.
Traditional preparation involves time-honored techniques that enhance natural flavors. Toasting dried chiles releases essential oils for deeper complexity. Soaking and blending create the perfect texture.
| Region | Signature Chiles | Flavor Characteristics | Traditional Use |
|---|---|---|---|
| Oaxaca | Pasilla, Costeño | Smoky, complex, medium heat | Festival celebrations |
| Yucatán | Chile Xcatik, Habanero | Fruity, very spicy, bright | Special occasions |
| Central Mexico | Ancho, Guajillo | Sweet, mild, versatile | Daily meals |
| Northern States | California, Chipotle | Smoky, robust, adaptable | Family gatherings |
Understanding this heritage adds meaning to your cooking. Preparing from scratch connects you to centuries of culinary tradition. Modern recipes preserve authenticity while accommodating contemporary kitchens.
Different chile varieties contribute unique characteristics to each recipe. From mild ancho peppers to smoky chipotles, the choices are vast. Taking time to explore these options enriches your culinary experience.
Essential Ingredients for an Unforgettable Tamale Chili Sauce
The true character of your Mexican-inspired creation emerges from the careful selection of foundational components. Each element plays a specific role in building depth and complexity.
Fresh Chiles, Tomatoes, and Spices
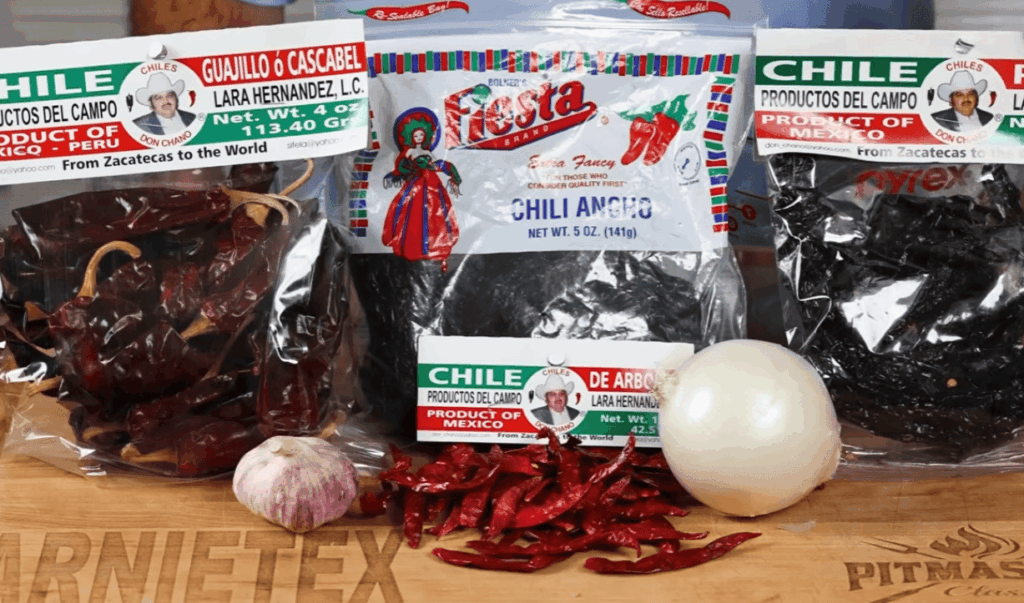
Your dried chiles are the heart of this recipe. California varieties offer mild sweetness, while New Mexico peppers contribute earthy notes. Ancho and pasilla chiles add smoky sophistication.
For a gentle warmth, include a few chile de arbol peppers. These small ingredients pack noticeable heat.
Fresh tomatoes provide balancing acidity. Aromatic garlic cloves enhance the savory profile. Proper salt measurement ensures all flavor components shine.
| Chile Variety | Heat Level | Flavor Notes | Best For |
|---|---|---|---|
| California | Mild | Sweet, fruity | Family-friendly versions |
| New Mexico | Medium | Earthy, tangy | Balanced depth |
| Ancho | Mild | Smoky, raisin-like | Complex undertones |
| Pasilla | Medium | Rich, herbal | Sophisticated blends |
Choosing High-Quality Stock and Seasonings
Your liquid base matters tremendously. Rich chicken or beef broth creates depth. Typically, two cups of broth achieve the perfect consistency.
Essential seasonings include cumin for warmth and oregano for herbal notes. Sometimes a touch of sugar balances acidity.
Water helps rehydrate dried chiles during soaking. This process softens them for blending and removes bitterness.
Remember—your personal touch with these ingredients makes the creation uniquely yours.
Prepping and Soaking Chiles: Tips and Tricks
The secret to a perfectly smooth Mexican-inspired topping lies in how you handle dried peppers before cooking. Proper preparation ensures your final creation has the right texture and balanced flavors.
Taking time with these initial steps prevents bitterness and creates a velvety consistency. Your patience during preparation pays off in every bite.
Soaking Techniques and Best Practices
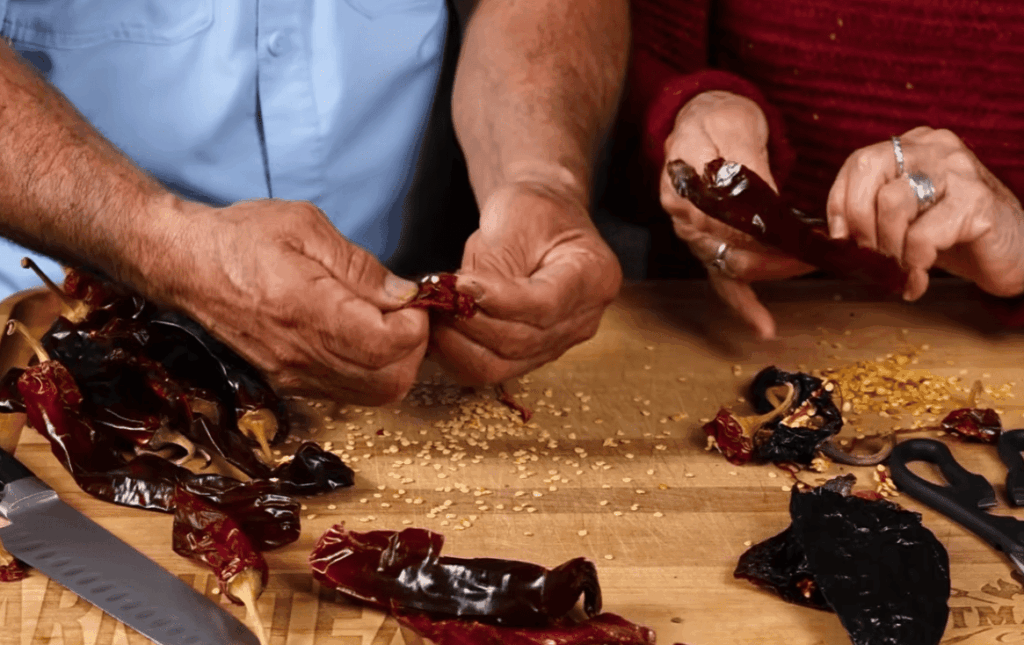
Begin by carefully splitting each dried pepper lengthwise. Remove the seeds and white membranes inside. This step controls heat levels and prevents unwanted bitterness.
Cut larger chiles into 1-2 inch pieces for even rehydration. Small varieties like chile de arbol can stay whole. Use a firm brush to wash away any dust or debris.
Place your prepared peppers in a pan with tomatoes and garlic. Add enough chicken stock or water to cover everything—about 2 cups usually works well.
Heat the mixture on medium until boiling. Then reduce to low and simmer for 20-30 minutes. The chiles should become completely soft and pliable.
Best practices include checking periodically during soaking. Ensure all pieces remain submerged. Rushing this process can result in a grainy texture.
If your soaking liquid turns very dark or tastes bitter, strain the softened vegetables. Replace with fresh chicken stock before blending for cleaner flavors.
Traditional Cooking Methods for Authenticity
The magic of authentic Mexican cooking comes alive during the final simmering stage. This is where patience transforms simple ingredients into complex, layered creations that define traditional cuisine.
Simmering Techniques to Enhance Flavors
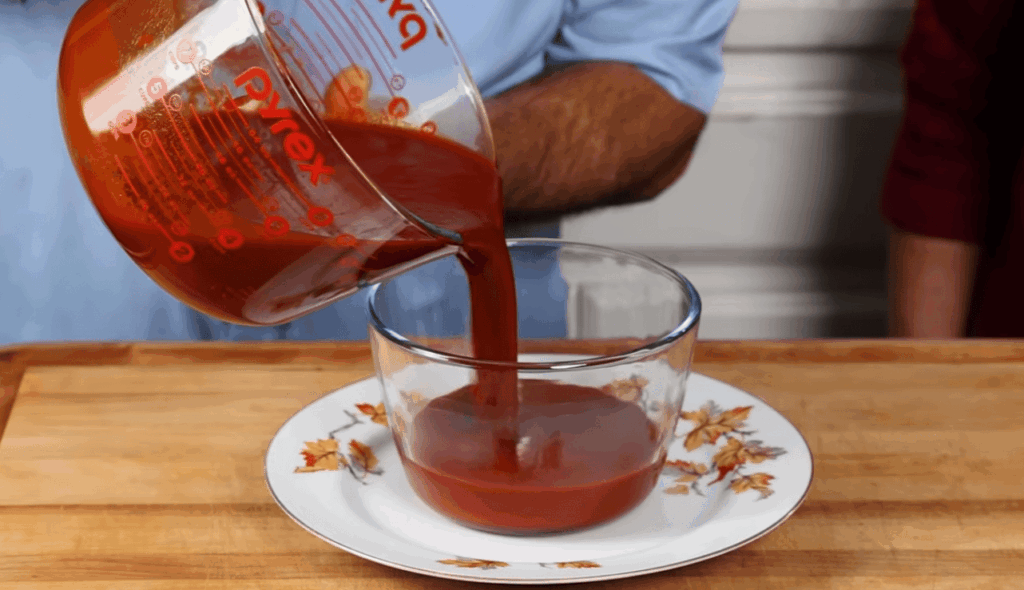
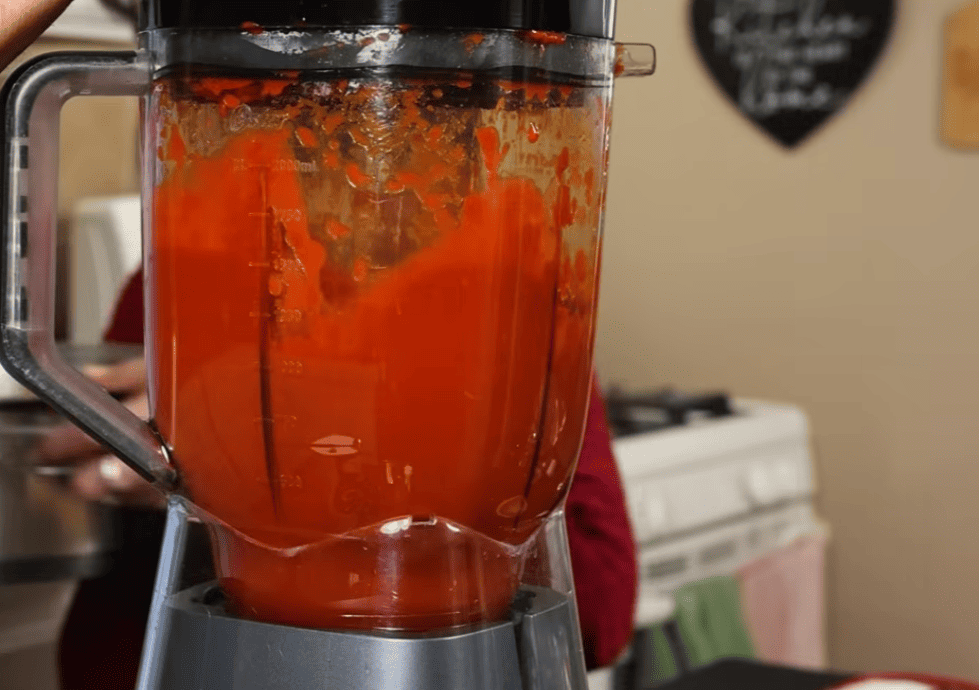
After your chiles and vegetables have softened, transfer everything to a blender. Process until completely smooth for that velvety texture everyone loves.
If the soaking liquid looks too dark, strain the vegetables first. Discard the liquid and use fresh chicken stock instead. This ensures clean, pure flavors in your final creation.
Return the blended mixture to the same pot you used earlier. Those flavorful bits stuck to the bottom will enhance your sauce beautifully. This traditional method maximizes flavor development.
Simmer over low to medium heat for about 15 minutes. Stir occasionally to prevent sticking. The gentle heat allows flavors to meld together perfectly.
This simmering time also thickens the sauce naturally. You’ll achieve that ideal coating consistency that clings to foods wonderfully.
Always taste during simmering and adjust seasonings as needed. Add spices or salt in small increments. This is the authentic way to build balanced flavor profiles.
Using a heavy-bottomed pot distributes heat evenly. This prevents scorching and bitter notes. Your careful preparation deserves this final attention to detail.
A Step-by-Step Guide to Making Your Tamale Chili Sauce
Let’s walk through each stage of preparation to ensure your homemade creation achieves that authentic texture and flavor profile. This detailed approach guarantees consistent results every time you follow this reliable method.
Detailed Cooking Process and Timing
Begin by placing your prepared chiles in a pot with tomatoes, garlic, and about two cups of chicken stock or water. Bring the mixture to a boil over medium heat, then reduce to a gentle simmer.
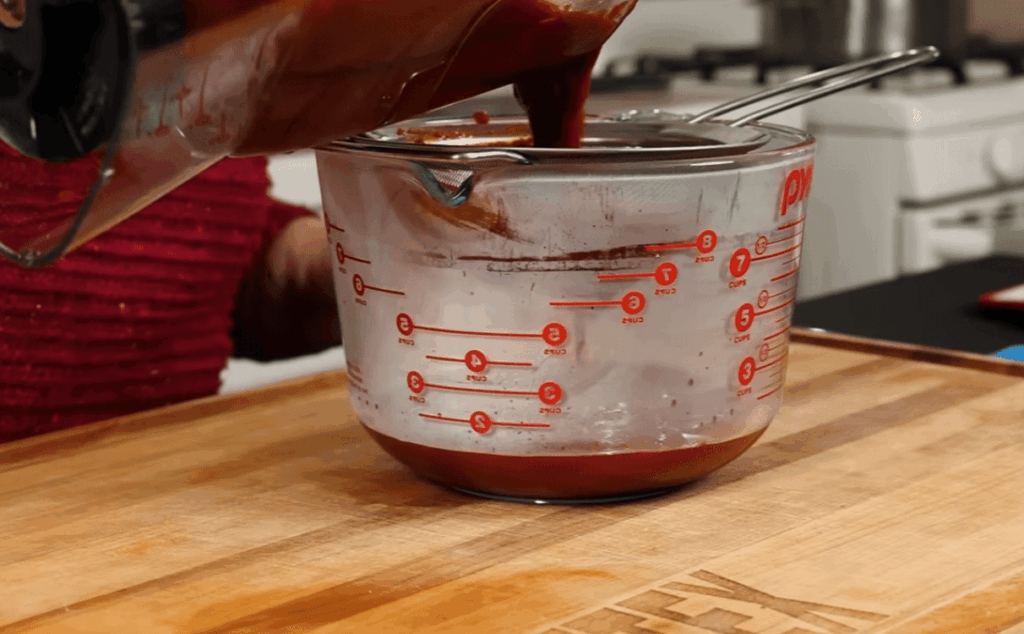
Cook for 20-30 minutes until everything becomes completely tender. Carefully transfer the softened ingredients to your blender, working in batches if needed.
Safety first when blending hot liquids! Start your blender on the lowest speed and gradually increase. This prevents dangerous steam explosions that can cause burns.
Process the mixture for several minutes until perfectly smooth. Return the blended creation to your pot and simmer for another 15 minutes to thicken slightly.
This recipe yields about one quart of delicious tamale topping. That’s enough for 45-50 tamales or multiple meals throughout your week. Taste during the final minutes and adjust seasonings as needed.
Your blender is essential for achieving restaurant-quality texture. This kitchen tool makes the smooth consistency that defines authentic Mexican cuisine.
Adjusting Heat and Achieving the Perfect Flavor Balance
Seasoning your creation properly requires understanding how flavors transform when mixed with other ingredients. What seems bold when tasted alone will mellow significantly when spread across 45-50 tamales and combined with masa and fillings.
The heat level needs careful consideration. Your chili pepper warmth should be noticeable but not overwhelming. A creation that tastes quite spicy on tortilla chips often becomes perfectly balanced in the final dish.
Salt plays a crucial role in bringing out all the other flavors. Add it gradually and taste frequently. Remember that if you’re using this as a filling, you’ll need more seasoning than for a table condiment.
If your mixture tastes flat, try small adjustments. A pinch of cumin adds earthiness, while oregano provides herbal notes. Even a tiny bit of sugar can balance acidity and round out harsh edges.
For milder preferences, reduce spicy peppers like chile de arbol. Removing more seeds and membranes from your chili peppers before soaking also creates a gentler profile.
The key to perfect taste is bold seasoning since the flavor gets distributed widely. Underseasoning is a common mistake that leads to disappointing results despite all your effort.
If planning dual use, consider making a larger batch. Reduce salt and seasonings in the portion you’ll serve separately. This approach ensures optimal taste for both applications.
Using Tamale Chili Sauce in Your Favorite Tamale Dishes
The real magic happens when you combine your homemade creation with perfectly prepared masa and fillings. This versatile recipe works beautifully across many traditional dishes.
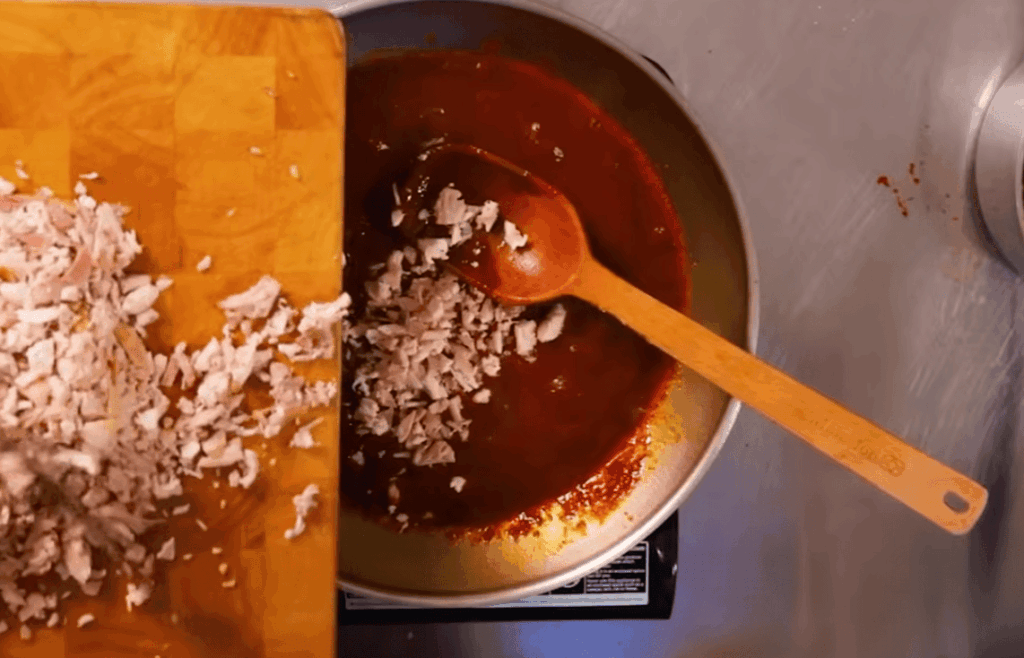
For classic pork versions, mix a small amount directly into your masa dough. This adds wonderful taste and a beautiful reddish color. Reserve most of the mixture to blend with your pulled pork roast filling.
This preparation is particularly well-suited for beef dishes. The tomato base complements rich, savory flavors perfectly. It creates a harmonious combination that tastes authentic and deeply satisfying.
When preparing meat fillings, cook your pork or beef until tender enough to shred. Mix the shredded meat thoroughly with your prepared creation. Ensure every piece is well-coated and flavorful.
This approach also works wonderfully for chicken dishes if you prefer red over green. Many traditional cooks choose tomatillo-based green preparations for poultry. The brighter, tangier flavors complement lighter meats differently.
Beyond meat-filled options, you can use this in vegetarian versions. Mix it with beans, cheese, or roasted vegetables. Adjust seasonings slightly to complement your chosen filling ingredients.
Don’t limit yourself to just one application. Experiment with different amounts in your masa versus filling. Try using it as a topping when serving finished dishes for an extra flavor boost.
Creative Variations and Alternatives for Every Taste
Exploring variations allows you to transform a basic recipe into something uniquely your own. The foundation method welcomes endless customization to match different preferences and dietary needs.
Tex-Mex, Vegetarian, and Dairy-Free Options
Feel free to mix chile varieties based on what you have available. You don’t need to commit to only one or two kinds of peppers. Mexican cooks traditionally use whatever combination creates the desired flavor profile.
For richer recipes, try incorporating chipotle peppers. They add smoky complexity that works beautifully with beef and pork dishes. Combining multiple chile types creates sophisticated, layered flavors in one batch.
| Chile Combination | Flavor Profile | Best For |
|---|---|---|
| California + Guajillo | Sweet with mild heat | Family-friendly versions |
| Pasilla + Arbol + Jalapeño | Earthy with spicy brightness | Bold, complex recipes |
| Chipotle + Ancho | Smoky with fruity notes | Rich meat dishes |
Vegetarian alternatives are simple to create. Use vegetable stock or water instead of chicken broth. This substitution makes plant-based recipes equally delicious.
Dairy-free versions come naturally since traditional preparations contain no dairy products. Tex-Mex style recipes might include cheese, but you can easily omit it.
For chicken-specific recipes, consider reducing tomato content. Add more broth for a lighter consistency. Each variation becomes part of your personal collection.
Nutritional Insights and Calorie Considerations
Many home cooks appreciate learning that their flavorful accompaniment is surprisingly light on calories and fat. Understanding the nutritional profile helps you make informed decisions about portion sizes.
Each tablespoon contains approximately 12 calories with zero grams of fat. The minimal calories come mainly from natural sugars in tomatoes and peppers.
It’s important to note that sodium content is the primary consideration. With about 251mg per tablespoon, you can reduce this by using low-sodium broth. When serving on the side, most people use 2-4 tablespoons.
This contributes roughly 24-48 calories per serving. Compared to store-bought options loaded with preservatives, homemade versions offer cleaner ingredients.
The recipe contains no added fat unless you choose to include it. This makes it a wholesome option for various dietary needs. On the side note, peppers and tomatoes provide beneficial nutrients like vitamin C.
These values are based on a 2000 calorie diet. You have complete control over ingredients when making it yourself. This allows adjustments for specific health goals.
Storing, Reheating, and Freezing Your Homemade Sauce
Your homemade creation deserves proper care to maintain its vibrant flavor for future meals. Planning ahead makes tamale preparation much easier when you have this essential component ready to go.
Best Storage Methods and Shelf-life Tips
After cooking, let your creation cool completely at room temperature. This important step prevents condensation and maintains food safety. Never store hot items directly in the refrigerator.
Transfer the cooled mixture to airtight containers for refrigeration. It will keep its fresh quality for 3-4 days. This timeframe works perfectly for weekly meal preparation.
For longer storage, freezing is your best option. Use freezer-safe containers or heavy-duty bags. Remove excess air to prevent freezer burn. Your creation will maintain quality for up to six months.
- Cool completely before storage to preserve texture
- Refrigerate for 3-4 days in airtight containers
- Freeze for up to 6 months in portion-sized amounts
- Reheat gently on the stovetop when ready to use
When reheating, use a pot on the stovetop over low heat. Stir occasionally for even warming. This process typically takes 5-10 minutes.
If the mixture thickens during storage time, add a splash of broth or water. Adjust to your preferred consistency. You can also tweak seasonings at this time.
For frozen portions, thaw overnight in the refrigerator. Alternatively, reheat slowly directly from frozen. Stir frequently during this process. Portioning before freezing saves time later.
Proper storage ensures your delicious sauce remains ready whenever inspiration strikes. These simple methods guarantee perfect results every time.
Tex-Mex Inspirations: Quick and Smoky Sauce Variations
When time is short but flavor is a priority, this Tex-Mex twist delivers incredible results in a fraction of the time. It’s the perfect solution for busy weeknights or when you want a rich, smoky topping without a long cooking process.
Exploring Cheesy and Smoky Tex-Mex Twists
This version builds flavor quickly using a classic roux base. You’ll need a few simple ingredients to create a rich, gravy-like consistency.
- 2 tablespoons butter
- 3 tablespoons all-purpose flour
- 2 cups vegan beef-style broth
- 1 tablespoon adobo sauce from canned chipotles
- 2 teaspoons taco seasoning
- 1/4 cup shredded mild cheddar cheese
Start by melting the butter in a saucepan over medium heat. Whisk in the flour until it forms a smooth paste. This roux is the foundation for a thick, luxurious texture.
Gradually add the broth, whisking constantly to prevent lumps. Let the mixture simmer for about 5 minutes until it thickens slightly. The key to a deep, smoky flavor is using the adobo sauce from canned chipotles.
Finally, stir in the taco seasoning and cheese until everything is melted and smooth. Your quick, flavorful creation is ready to enjoy in just 15 minutes or less.
Conclusion
With these techniques at your fingertips, you’re ready to impress family and friends with professional-quality results. You’ve mastered both traditional and quick methods to make tamales that shine.
Whether preparing meat or vegetable fillings, you now understand how to balance flavors perfectly. Adjusting salt, cumin, and sugar ensures every dish tastes amazing.
Remember that removing seeds controls heat, while garlic and dried pepper varieties create depth. This recipe gives you flexibility for any occasion.
Your homemade creations connect you to generations of culinary tradition. Feel free to experiment and make each batch your own special way.
Now you can create unforgettable tamales any time! Your kitchen is ready for authentic Mexican feasts.