Did you know that over 80% of home cooks who attempt Mexican dishes say the sauce makes or breaks the entire meal? That rich, flavorful liquid can transform simple ingredients into something truly spectacular.
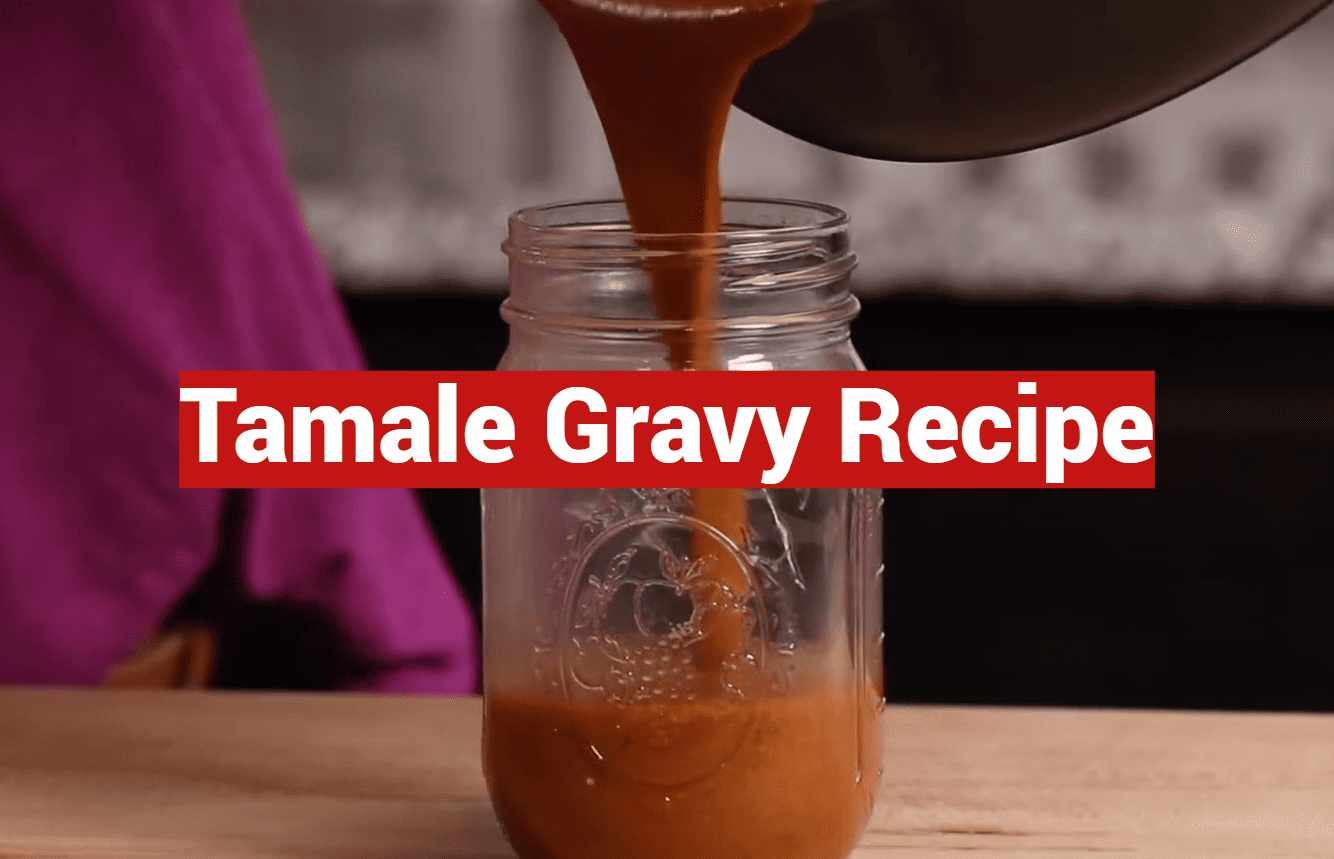
Welcome to your ultimate guide for creating the perfect accompaniment that will elevate your Mexican dishes from good to absolutely unforgettable. This comprehensive walkthrough shows you everything needed to master a rich, flavorful preparation that complements traditional masa-based dishes beautifully.
Whether you’re preparing a quick weeknight dinner or hosting a festive gathering, this approach delivers consistent, delicious results every single time. You’ll discover both authentic traditional methods and quicker modern variations.
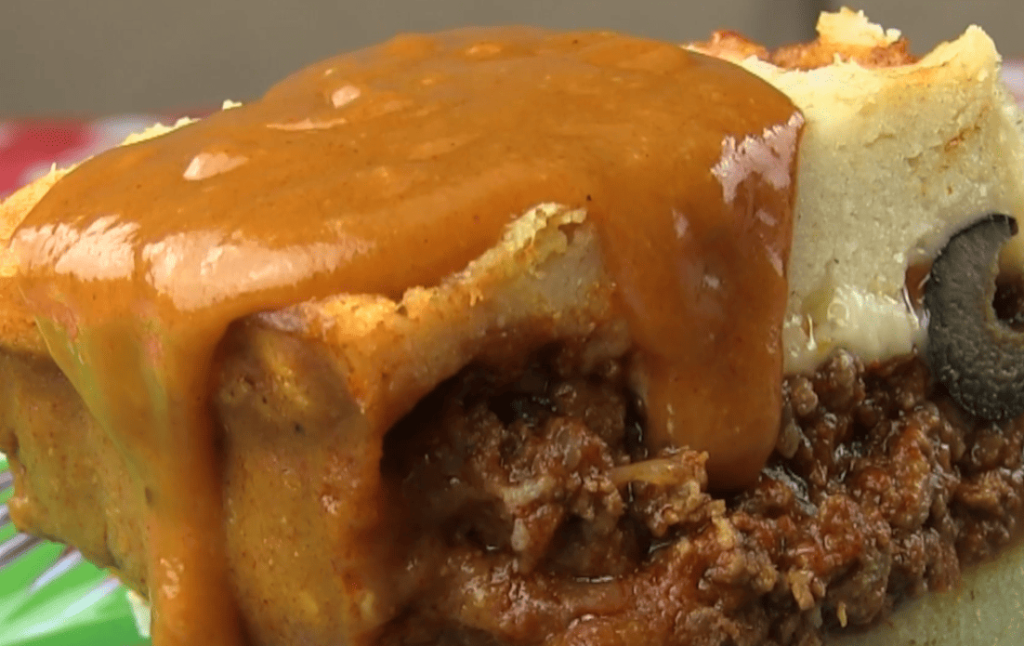
The true beauty lies in its incredible versatility. Use your creation not just for its intended purpose, but also for enchiladas, burritos, and countless other Mexican favorites. Get ready to master a kitchen skill that will make you the star of every celebration.
Key Takeaways
- Master both traditional and modern preparation methods
- Learn techniques for achieving perfect consistency every time
- Discover how to adapt the flavor profile to suit different dishes
- Understand the key ingredients that make this sauce special
- Gain confidence to experiment with your own variations
- Learn proper storage and reheating methods
- Discover unexpected uses beyond traditional Mexican cuisine
Introduction to Tamale Gravy
Modern cooking demands both authenticity and efficiency, creating the perfect balance between traditional flavors and contemporary convenience. This approach brings restaurant-quality results to your kitchen without the complex preparations that often intimidate home cooks.
Why This Preparation Stands Out
The true advantage lies in its remarkable speed. Traditional methods can take hours with chili roasting and soaking. This version achieves rich, complex flavors in just 12-15 minutes.
You’ll appreciate how accessible the ingredients remain. Most components wait in standard grocery stores, eliminating specialty market hunts. The method proves forgiving for beginners yet satisfies experienced cooks seeking customization.
Overview of Ingredients and Flavors
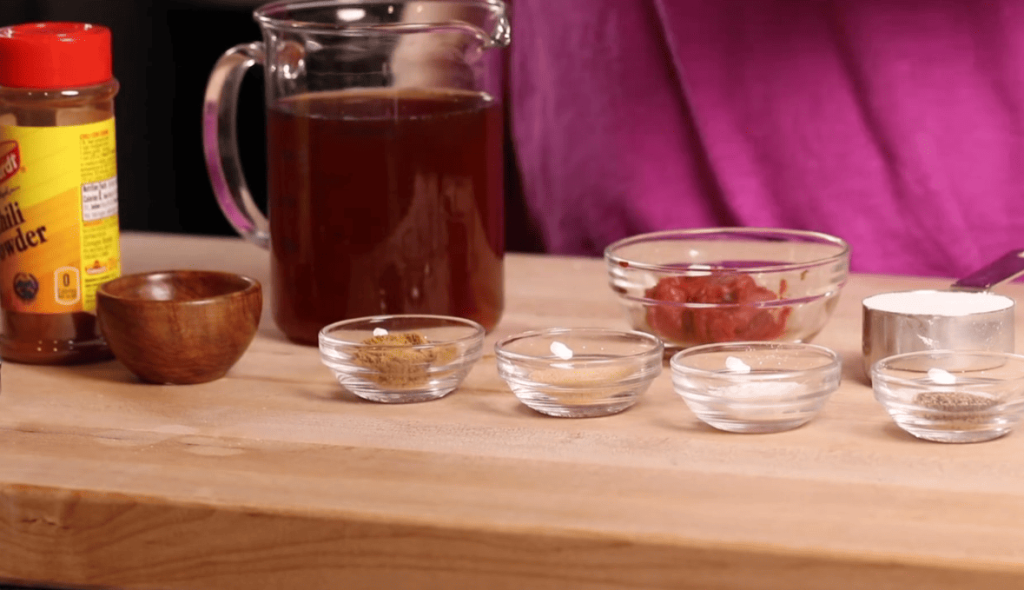
This sauce builds on a foundation of savory beef broth, smoky adobo, and creamy melted cheese. The combination creates depth that complements corn masa beautifully. Each component contributes to a balanced flavor profile.
The versatility extends beyond its primary use. It works equally well mixed into fillings or drizzled over finished dishes. Whether preparing pork, chicken, or vegetarian options, the sauce adapts perfectly.
| Aspect | Traditional Method | Modern Approach |
|---|---|---|
| Preparation Time | 2-3 hours | 12-15 minutes |
| Ingredient Complexity | Specialty dried chilies required | Standard grocery store items |
| Equipment Needed | Blender, roasting tools | Basic saucepan and whisk |
| Flavor Result | Authentic smoky depth | Rich, creamy complexity |
| Yield | Varies by recipe | Approximately 2 cups |
History and Cultural Significance
The story of this rich, red sauce stretches back thousands of years to the very foundations of Mexican culinary traditions. Ancient Mesoamerican civilizations perfected the art of creating flavorful accompaniments for their masa-based dishes.
Traditional mexican red chile sauce represents centuries of culinary evolution. Cooks would laboriously grind dried chiles, garlic, and spices by hand. They carefully selected specific varieties like California, New Mexico, Ancho, and Pasilla peppers.
The authentic process begins with roasting chiles to deepen their flavor. Then they soak in water to rehydrate before blending into a smooth puree. This creates the base for the classic sauce that thickens beautifully.
These preparations hold special significance during celebrations. Families gather for tamaladas (tamale-making parties) where generations work together. The shared experience strengthens cultural bonds through food.
Along the Texas-Mexico border, a cultural fusion created the Tex-Mex adaptation. This version honors the spirit of the dish while accommodating modern lifestyles. Both approaches represent valid expressions of a living culinary tradition.
Understanding this heritage helps you appreciate the depth behind each flavorful spoonful. Whether traditional or contemporary, the essence remains connecting people through shared culinary experiences.
Exploring Key Ingredients and Spices
The magic behind any exceptional Mexican sauce begins with understanding its fundamental building blocks. Each component plays a specific role in creating the final masterpiece.
Essential Ingredients: Butter, Flour, and Broth
Your foundation starts with butter, which creates a rich base for the roux. If you prefer alternatives, avocado or canola oil work beautifully.
Three tablespoons of all-purpose flour provide the perfect thickening power. This amount ensures your creation clings beautifully without becoming heavy.
Two cups of unsalted beef broth deliver savory depth. Choosing low-sodium varieties helps you control the final salt level.
Spice Blends and Mexican Flavor Profiles
Adobo sauce from canned chipotles brings that signature smoky flavor with gentle heat. It already contains paprika, garlic, salt, oregano, and vinegar.
Taco seasoning offers convenience with its blend of cumin, chili powder, and other spices. American cheese melts perfectly, while mild cheddar provides excellent alternatives.
“The right combination of spices can transform simple ingredients into something extraordinary.”
| Ingredient | Quantity | Key Function |
|---|---|---|
| Unsalted Butter | 2 tablespoons | Rich roux foundation |
| All-Purpose Flour | 3 tablespoons | Thickening agent |
| Beef Broth | 2 cups | Savory liquid base |
| Adobo Sauce | 2 tablespoons | Smoky flavor base |
| Taco Seasoning | 2 teaspoons | Convenient spice blend |
For authentic versions, dried peppers like Ancho and Pasilla contribute distinct notes. Fresh garlic and ground cumin deliver that unmistakable Mexican profile.
Step-by-Step Cooking Process
The transformation from simple ingredients to a rich, flavorful sauce happens through careful technique. Following these steps ensures your creation turns out perfectly every time.
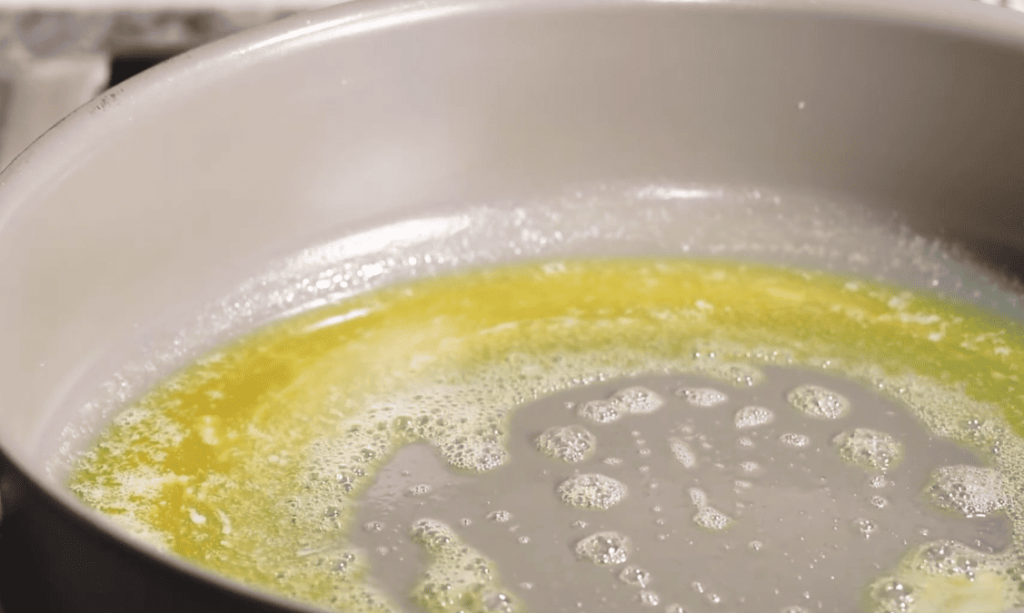
Creating a Rich Roux
Begin by placing your skillet over medium heat. Add the butter and let it melt completely without browning. This creates the best flavor foundation.
Sprinkle flour evenly across the melted butter. Whisk continuously to form a smooth paste. Cook this roux for 1-2 minutes to eliminate the raw flour taste.
Gradually add beef broth, starting with small splashes. Whisk vigorously after each addition. This prevents lumps from forming in your mixture.
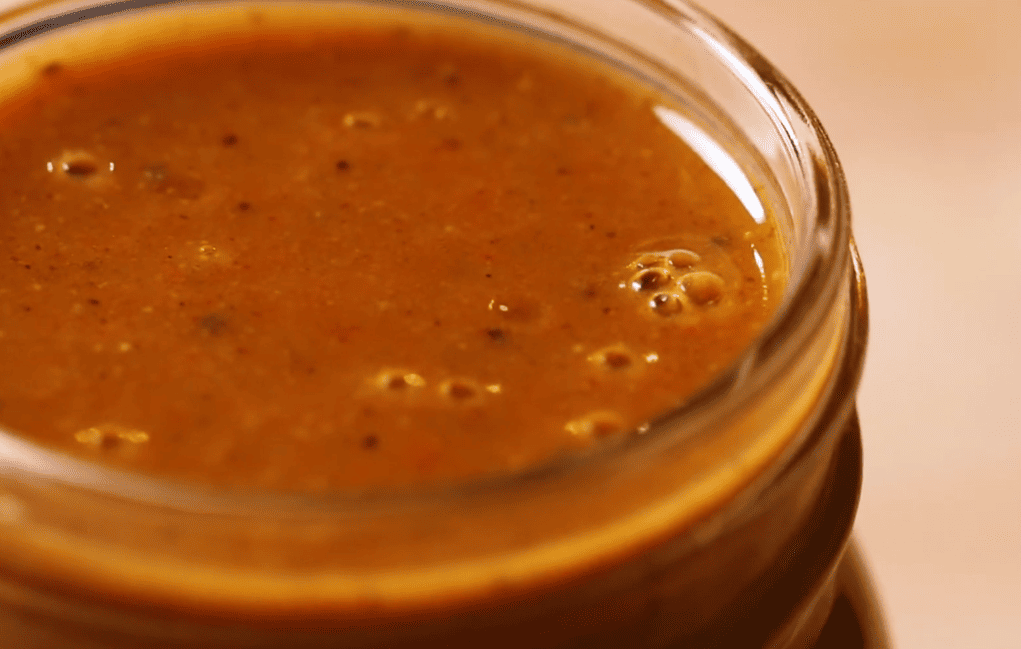
Simmering to Achieve Pudding-like Consistency
Continue adding broth until the sauce reaches a pudding-like consistency. This texture ensures perfect thickness for coating your dishes.
Once achieved, stream in the remaining broth while maintaining constant whisking. Allow the sauce to simmer gently for about 5 minutes.
Reduce the heat to low and stir in adobo sauce and taco seasoning. Add cheese and keep stirring until it melts completely into a smooth, creamy texture.
The entire process takes just 12-15 minutes from start to finish. This makes the preparation incredibly convenient for busy weeknights.
Mastering the Tamale Gravy Recipe
Professional chefs know that consistent results require understanding both what to do and what to avoid in the kitchen. This preparation makes enough for 12-14 servings, so getting it right matters.
Pro Tips for a Perfect Gravy
Maintain consistent heat throughout your cooking process. Use medium temperature for the roux and gentle simmering afterward. This prevents burning and ensures even thickening.
Always whisk constantly when adding liquid to avoid lumps. Start with small amounts and build gradually. This gives you better control over the final texture.
Use unsalted broth to avoid overseasoning. You can always add salt later but cannot remove it. Taste boldly before serving—the flavor should be slightly intense since it spreads across many servings.
Common Pitfalls and How to Avoid Them
If your creation becomes too thick, whisk in additional broth one tablespoon at a time. For thin results, simmer a few extra minutes or add a small amount of flour mixed with cold water.
When using ground meats or fatty ingredients, consider reducing the butter or fat content slightly. This balances the overall richness perfectly.
Store leftovers in airtight containers for 3-4 days. Reheat gently over low heat while whisking frequently. Add a splash of broth if needed to restore smooth consistency.
Customizing Your Gravy for Mexican Dishes
The real magic of this Tex-Mex creation unfolds when you start tailoring it to your favorite dishes. Its incredible versatility makes it a superstar in your kitchen.
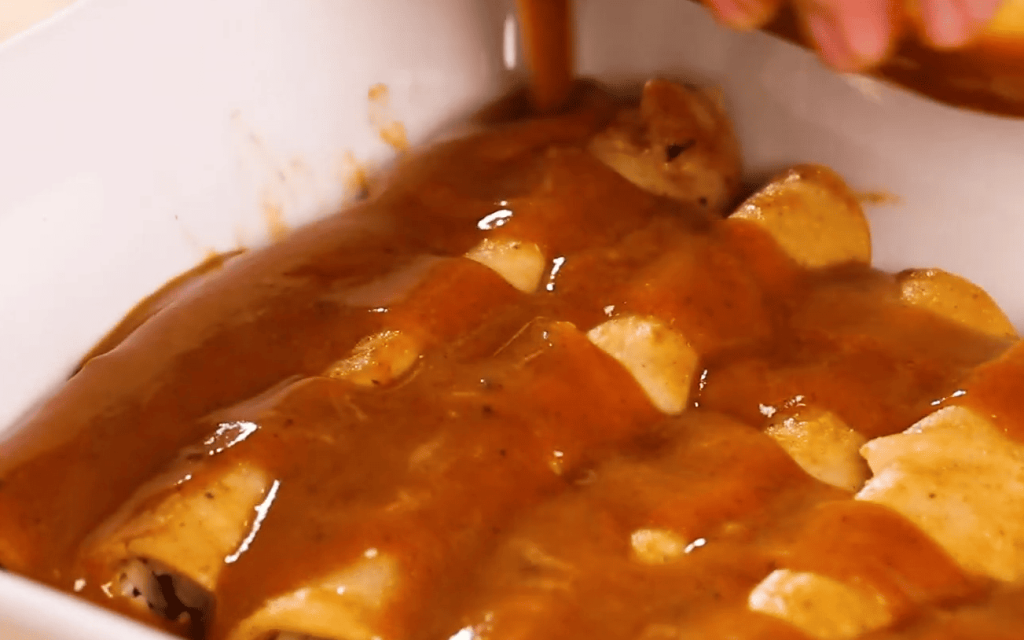
You can use it to enhance enchiladas, burritos, chimichangas, tacos, and nachos. Each dish benefits from its rich, creamy texture.
Enhancing with Extra Spices and Variations
Adjusting the flavor profile is simple. For enchiladas, use less spices since the sauce covers fewer pieces.
Love more heat? Add chopped chipotle peppers or a pinch of cayenne pepper. This gives a sharper, immediate kick.
For a deeper smoky flavor, increase the adobo sauce or add smoked paprika. It pairs beautifully with beef or pork fillings.
Want a traditional Mexican red chile taste? Blend in rehydrated dried chiles like guajillo or ancho.
- Boost earthy notes with extra cumin and oregano.
- Create a cheese sauce by stirring in an extra cup of shredded cheese while hot.
- Use it as a cooking liquid for slow-cooker meats for incredibly tender burritos fillings.
Pairing with Tamales, Enchiladas, and Burritos
This preparation is a perfect partner for classic tamales. It complements the corn masa beautifully.
For your enchilada sauce, remember the spice adjustment. Control the pepper level by choosing mild or hot seasoning.
Vegetarian? Use vegetable broth and plant-based alternatives. The essential flavor profile remains intact.
Think beyond the main course. Serve it warm as a dip for tortilla chips at parties.
Mix leftovers into scrambled eggs or top your breakfast burritos. It extends the delicious Tex-Mex flavors throughout your day.
Achieving Ideal Texture and Consistency
Texture mastery transforms your cooking from amateur attempts to professional-level results. The perfect consistency should coat a spoon thickly without being gloppy. Think of pudding-like thickness that clings beautifully to your dishes.
This ideal texture starts with your roux foundation. Cook the butter and flour mixture for the full 1-2 minutes. This step activates the flour’s thickening power properly.
Cooking Time and Temperature Techniques
Maintain medium heat during the initial stages. This prevents scorching while allowing proper thickening. The critical simmering time of about 5 minutes concentrates flavors and achieves optimal thickness.
Temperature control remains crucial throughout the process. Too high heat can cause separation, creating an oily surface. Gentle simmering ensures smooth, unified results every time.
Adjusting Thickness with Broth and Seasoning
If your creation becomes too thick, whisk in additional broth or water one tablespoon at a time. For thicker results, extend simmering by 2-3 extra minutes.
Remember that the sauce thickens slightly as it cools. Aim for a consistency just thinner than your final target when removing from heat. This simple trick guarantees perfect results upon serving.
Cheese addition significantly affects the final texture. American varieties create smoother results while cheddar adds more body. Adjust seasoning throughout the process, watching sodium levels as the sauce concentrates.
Serving Suggestions and Complementary Sides
A well-planned table setting with diverse flavors turns a simple meal into a festive celebration. The right accompaniments can elevate your main dish and create a memorable dining experience for everyone.
Thoughtful pairings balance rich flavors with fresh contrasts. This approach ensures every guest finds something they love.
Perfect Accompaniments for Tamales
Traditional Mexican sides create an authentic feast experience. Fluffy Spanish rice and creamy pinto beans complement the corn masa beautifully.
Offer a variety of toppings for customization. Set out bowls of sour cream, fresh guacamole, and diced onions. Lime wedges add a bright, citrusy finish.
Additional Dips and Side Dish Ideas
Tortilla chips with fresh salsa make excellent starters. Your leftover sauce works wonderfully as a warm cheese dip.
For heartier gatherings, prepare Rotel Dip with seasoned ground beef. Tomatillo avocado salsa provides a fresh, tangy contrast that cuts through rich flavors.
| Side Dish | Flavor Profile | Preparation Time | Best Pairing |
|---|---|---|---|
| Spanish Rice | Savory, tomato-based | 25 minutes | Beef-filled tamales |
| Mexican Pinto Beans | Creamy, earthy | 2 hours (or 5 min canned) | All tamale varieties |
| Tomatillo Salsa | Tangy, fresh | 10 minutes | Chicken tamales |
| Rotel Dip | Cheesy, spicy | 15 minutes | Party gatherings |
Store your creation in the refrigerator for 3-4 days. For longer storage, freeze portions for up to 6 months. Reheat gently on the stovetop over low heat, adding a splash of broth if needed.
Conclusion
Your kitchen adventures with Mexican cuisine just gained a powerful new tool that bridges tradition and modern convenience. Whether you choose the quick tamale sauce or authentic enchilada sauce approach, you’re equipped for success.
Remember that proper technique makes all the difference. A smooth roux and gradual liquid addition ensure perfect consistency every time. This versatile sauce recipe adapts beautifully to your personal taste preferences.
Don’t limit this gravy to just one dish—explore its potential with various Mexican recipes. The rich flavor profile enhances everything from simple weeknight dinners to festive celebrations.
Now you have the confidence to create exceptional homemade sauces that surpass store-bought options. Share these culinary skills and keep the tradition of outstanding Mexican cooking alive in your home.