Did you know that in many Mexican households, preparing this traditional dish is considered a sacred family ritual passed down through generations? The process brings families together in a way that few other meals can match.
These savory bundles represent one of the most beloved versions of a classic Mexican comfort food. They feature tender, simmered meat combined with a rich red sauce and enveloped in moist, fluffy corn dough. Each bite delivers authentic flavors that transport you straight to Mexico.
This particular preparation is truly a labor of love. While it requires significant time and effort, the results are vastly superior to anything you can buy pre-made. Store-bought versions often lack the depth of flavor and moisture that makes homemade ones so special.
I learned this cherished formula from relatives in Tijuana, where food connects us to our cultural heritage. The recipe has been tested and approved by natives from Guadalajara, ensuring its traditional authenticity.
Even if this is your first attempt at making this classic dish, you can absolutely succeed. The rewarding outcome—incredibly flavorful and authentically Mexican—is worth every moment spent in the kitchen.
Key Takeaways
- This dish represents a cherished family tradition in Mexican culture
- Homemade versions offer superior flavor and texture compared to store-bought
- The recipe requires time but delivers authentic Mexican flavors
- Even beginners can successfully create this classic meal
- The preparation connects you to generations of culinary heritage
- Tested by native cooks to ensure traditional authenticity
- The result is a rewarding, flavorful experience worth the effort
Introduction to Traditional Tamales
More than just a meal, tamales are edible symbols of community and celebration in Mexican culture. This classic dish connects people to a rich history through every flavorful bite.
The Cultural Significance
The very name gives a clue to its nature. It comes from the Nahuatl word “tamalli,” which translates to “wrapped food.” This simple term hints at a tradition spanning centuries.
At its core, the dish consists of masa, a dough made from ground corn. This dough is spread onto a corn husk, filled with savory ingredients, then wrapped and steamed. The result is a tender, flavorful bundle.
These creations are central to festive gatherings. They appear at holidays like Christmas and birthdays, turning the kitchen into a hub of storytelling and connection.
Why Homemade Tamales Are Special
Store-bought versions often miss the mark. They can be dry, skimp on the filling, and lack the soul of a homemade batch. The commercial process simply cannot replicate the care of a family kitchen.
The real magic happens when generations gather to cook. This shared effort strengthens bonds and creates lasting memories. The final product is not just food; it’s a tangible piece of heritage.
Learning to make them yourself is a rewarding journey. It allows you to share genuine flavors and continue a beautiful tradition with your own family.
Ingredients and Essential Equipment
Gathering the right components is the first crucial step toward creating these authentic bundles of flavor. Having everything prepared before you start makes the entire process smoother and more enjoyable.
Key Ingredients for the Filling and Salsa Roja
For the most flavorful meat, choose a bone-in pork butt. The bone adds rich flavor to the broth. Simmer it with aromatics like garlic, onion, bay leaves, and black peppercorns.
The vibrant salsa roja gets its character from dried chiles. Use a mix of guajillo and ancho chiles. Add a few chile de arbol for heat, if you like. Tomatillos provide a bright, balancing acidity.
For the dough, fresh masa preparada is highly recommended. It yields a superior texture compared to masa harina. You’ll also need baking powder, salt, and rich pork broth.
Must-Have Kitchen Tools and Steaming Equipment
An electric mixer is a huge help for whipping the masa to the perfect light consistency. A bench scraper makes spreading the dough onto corn husks much easier than using a spoon.
You need a tall steamer pot to cook the bundles vertically. Soaked corn husks line the bottom of the pot and cover the top during steaming. This prevents water from dripping onto them.
The Pork Filling: Flavor and Technique
Proper preparation of the main ingredient is what separates mediocre results from outstanding ones. Mastering these foundational steps ensures your final dish delivers maximum flavor and perfect texture.
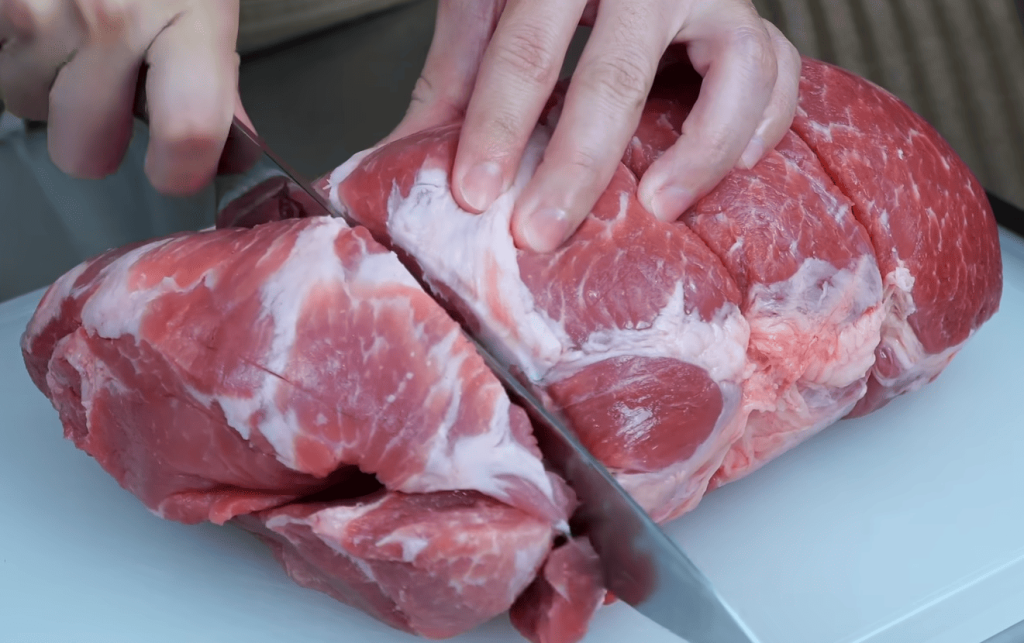
Choosing the Right Cut: Pork Shoulder vs. Pork Butt
Not all cuts are created equal. While both come from the shoulder area, pork butt (sometimes called Boston butt) is the superior choice. Its rich marbling of fat keeps the meat incredibly moist during the long cooking process.
Always select a bone-in piece. The bone adds deep flavor to your broth and collagen that enhances texture. Keep the meat in one large chunk rather than cutting it into smaller pieces.
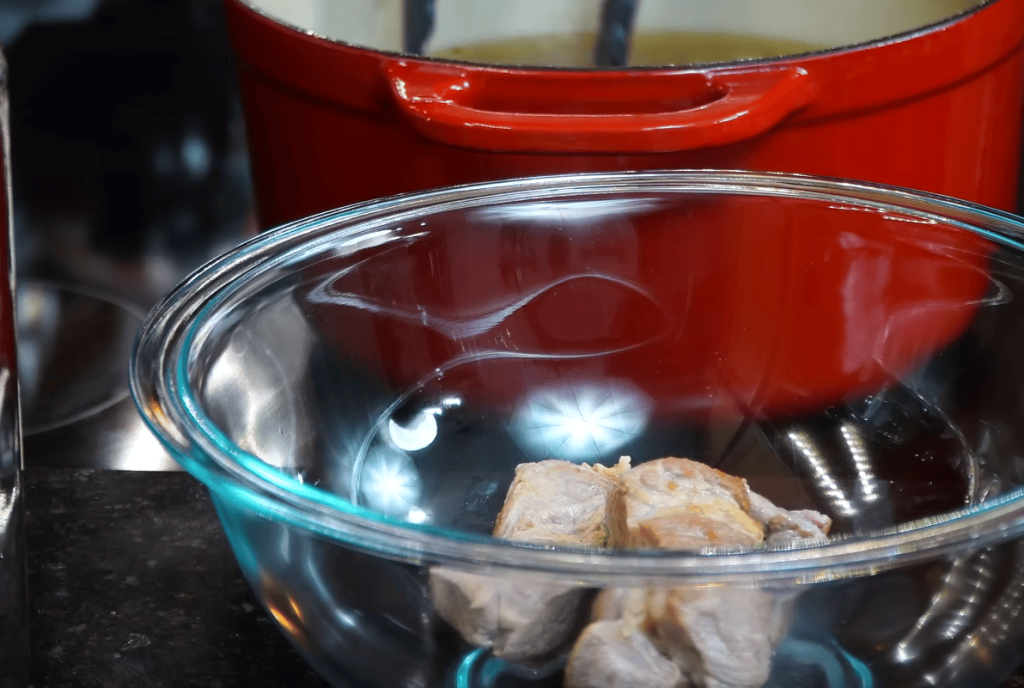
Simmering and Shredding for Tender Meat
Begin with cold water in your stockpot. Never add raw meat to boiling water as this toughens the fibers. Add aromatics like garlic, onion, and bay leaves.
Bring to a gentle boil, then reduce to a simmer for 2 to 2½ hours. Skim off any foam that rises to the surface. Cook until the meat is fork-tender.
Let the cooked pork cool before shredding. Avoid over-shredding into thin strips. Reserve the flavorful broth for your masa and sauce.
Crafting the Perfect Salsa Roja
Creating an authentic salsa roja transforms simple ingredients into a complex flavor foundation. This sauce brings everything together with its rich, deep character.
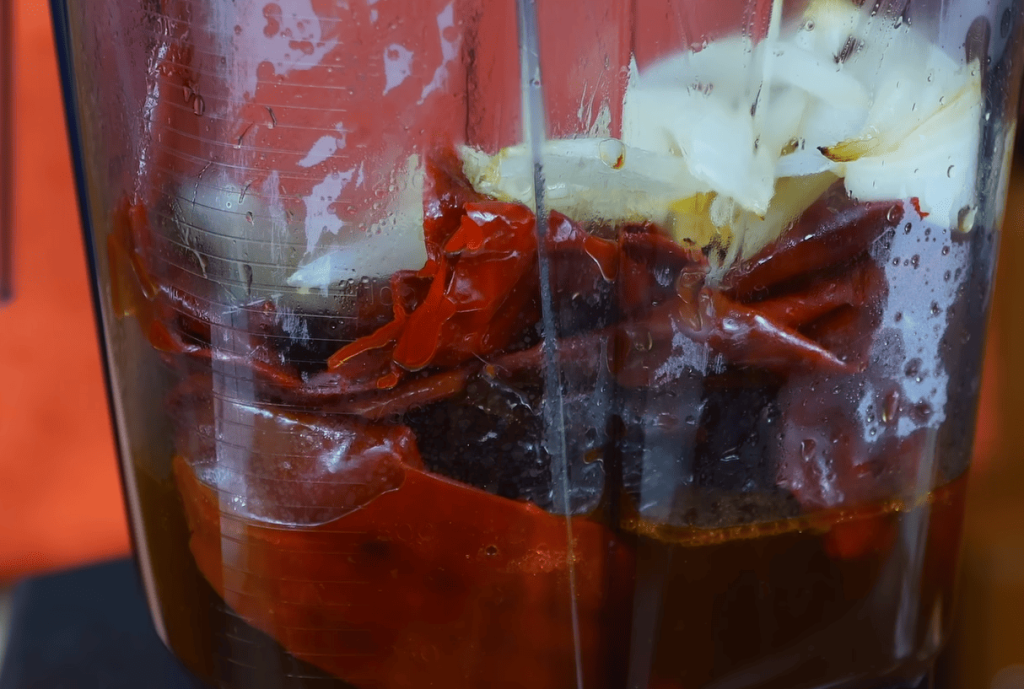
Rehydrating and Blending Dried Chiles
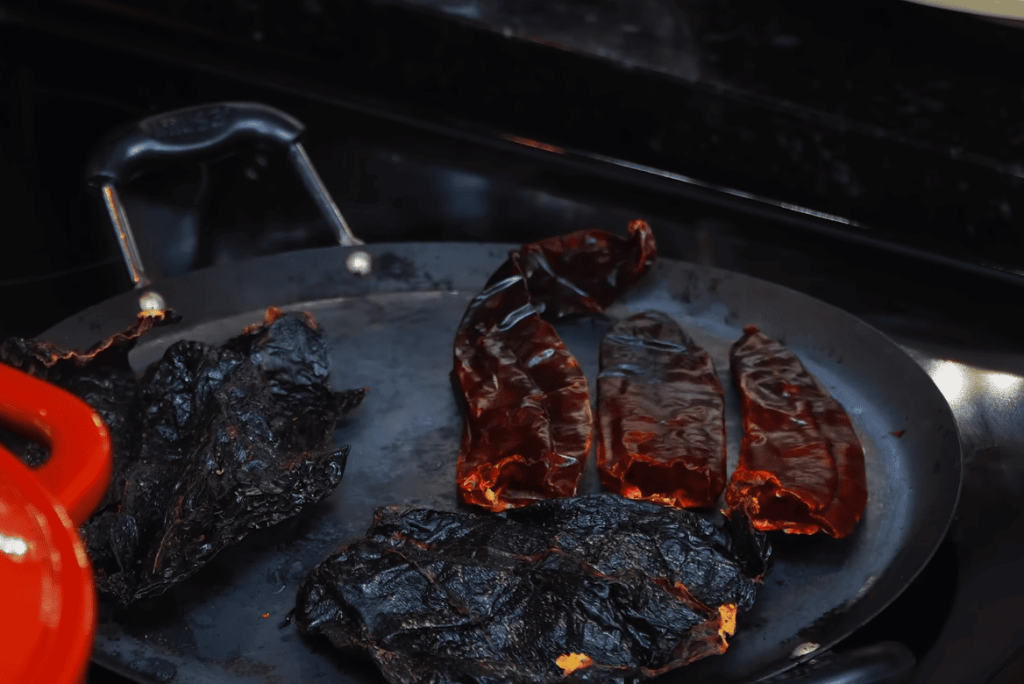
Start by preparing your dried chiles. Remove stems and seeds completely. Toast them on a comal over very low heat until fragrant.
Turn them constantly to prevent burning. You’ll notice their aroma deepening after a few minutes.
For rehydration, you have two excellent methods. Add the chiles to your pot with tomatillos and broth. Gently boil for about 10 minutes.
Alternatively, pour 2 cups of hot broth over the chiles. Let them soak for 5 minutes until pliable.
Combine the softened chiles with tomatillos, raw garlic, salt, cumin, and bouillon in your blender. Add 1¼ cups of the chili broth.
Blend for 1-2 minutes until completely smooth. Taste and adjust salt if needed.
Straining for a Smooth, Rich Sauce
Straining is essential for perfect texture. Push the blended sauce through a fine mesh strainer.
This removes any tough chile skin pieces. You want a completely smooth chile sauce.
Reserve ⅓ to ½ cup of this sauce for later use. Heat a tablespoon of lard in a pan over medium heat.
Carefully pour in the remaining sauce (about 3 cups). Fry for a couple of minutes while stirring.
This final step enhances the flavor dramatically. Your sauce is now ready to combine with the filling.
Preparation of Traditional Masa
The foundation of every great tamale lies in its masa dough—the heart and soul of this traditional dish. Getting this component right determines whether your final product will be light and fluffy or dense and heavy.
Fresh Masa vs. Masa Harina: What Works Best
For authentic results, fresh masa preparada from Mexican markets is highly recommended. This pre-prepared dough requires less work and delivers superior flavor.
If you must use masa harina (like Maseca), be prepared for extra mixing time. The texture and taste will differ from the fresh version.
| Feature | Fresh Masa Preparada | Masa Harina |
|---|---|---|
| Preparation Time | 25 minutes total mixing | 30-40 minutes by hand |
| Texture Result | Superior, authentic feel | Requires careful mixing |
| Ingredient Ratio | ½ cup fat, ⅓ cup salsa | ¾ cup fat, ½ cup salsa |
Perfecting the Dough with Pork Broth and Lard
Start by whipping your rendered fat with salt and baking powder for 2-3 minutes. This creates air pockets for lightness.
Combine your salsa with warm broth before slowly incorporating it into the dough. Mix thoroughly until smooth.
Perform the essential float test. Drop a coin-sized amount into water—if it floats, your masa is ready. If it sinks, add more fat or broth.
Microwave a tablespoon of dough for 20-30 seconds to taste for salt. It should be slightly over-salted since some saltiness escapes during steaming.
Let your prepared masa rest covered for 20 minutes before spreading. This allows ingredients to fully hydrate.
Assembling Your Tamales
This hands-on stage brings together all your previous work in a satisfying, creative process. The assembly method ensures each bundle cooks evenly and holds its delicious contents securely.
Proper Spreading and Filling Techniques
Begin by preparing your corn husks. Soak them in warm water for 15-30 minutes until flexible. Select medium to large husks without holes for wrapping.
Identify the smooth side of each corn husk. Spread about two tablespoons of masa evenly across this surface. Leave the top half empty and extend to the bottom edge.
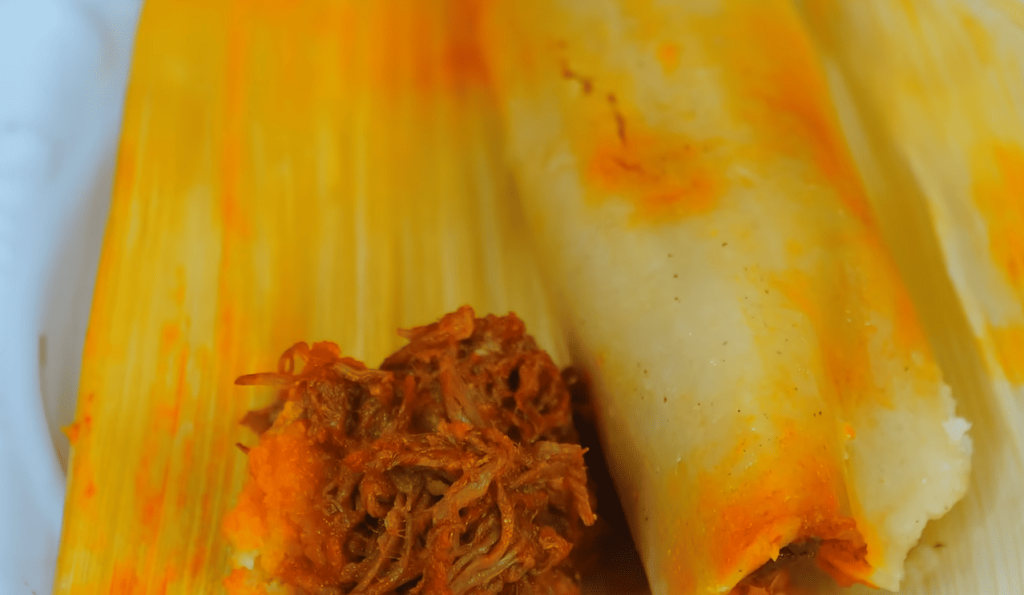
Place your cooled filling in the center of the masa layer. Be careful not to overfill, especially if your dough is thin. Too much sauce can cause leaking during cooking.
Fold one side of the husk over the filling. Then bring the other side across to completely enclose everything. The masa should wrap around the contents.
Finally, fold the narrow bottom end upward toward the center. This creates a secure pocket that holds everything together. Stack your assembled bundles at an angle to maintain their shape.
For extra security, tear a thin strip from another corn husk. Use it to tie around the folded bottom. This optional step helps identify different varieties if making multiple types.
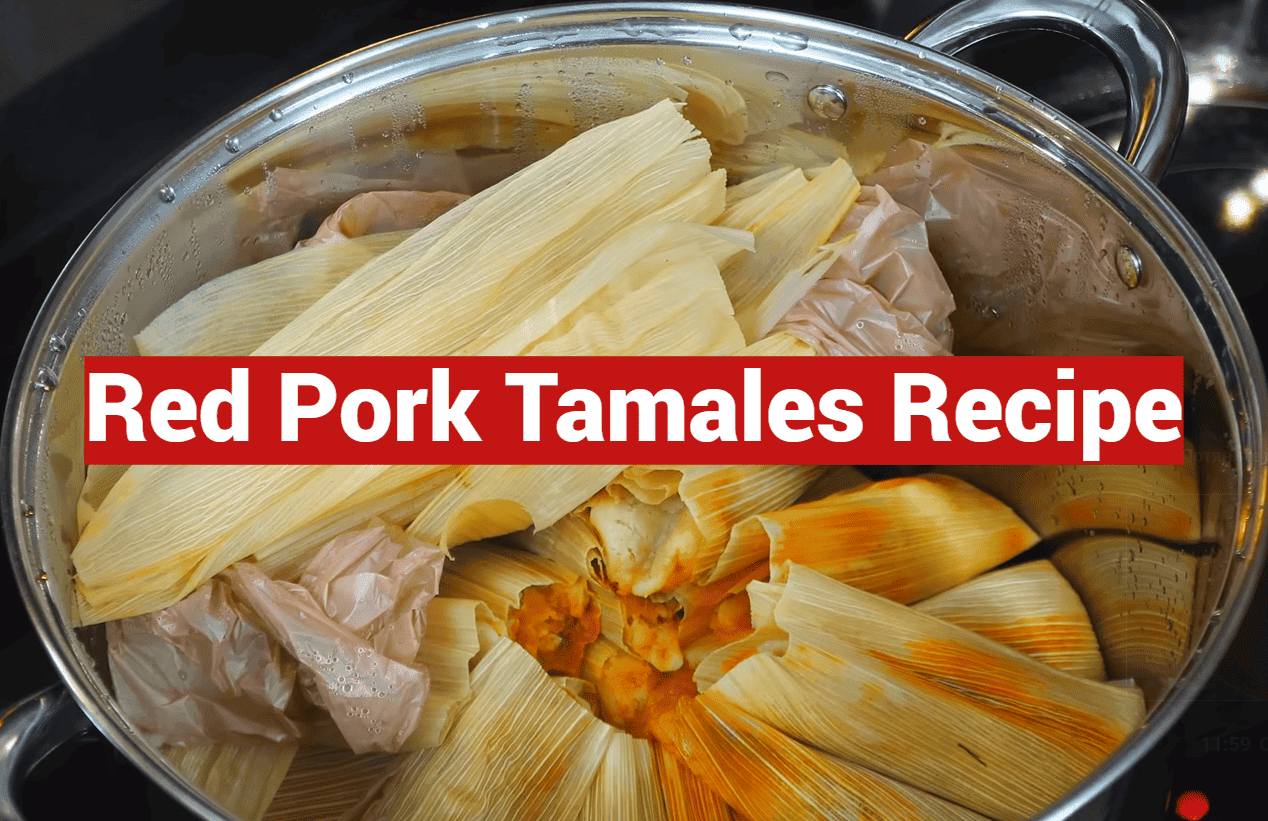
Steaming and Cooking the Tamales
The final transformation of your carefully prepared bundles happens during the steaming process, where heat and moisture work their magic. This stage requires patience and attention to detail for perfect results.
Setting Up Your Steamer Pot
Begin by filling your large steamer pot with water. Ensure the water level stays below the steamer basket. You don’t want water touching your creations during cooking.
Arrange three bundles in a “T” shape with open ends facing inward. This creates a stable base. Place the remaining bundles around this foundation with open ends up.
Cover everything with extra corn husks or a kitchen towel. This prevents condensation from dripping onto your bundles and making them soggy.
Timing and Temperature Guidelines
Bring the water to a boil over medium-high heat. Then reduce to medium-low for a gentle simmer. Avoid a rolling boil, which can make the masa tough.
Steam for 50 minutes to 2 hours depending on quantity. Check water levels every 30 minutes. Add more hot water if needed.
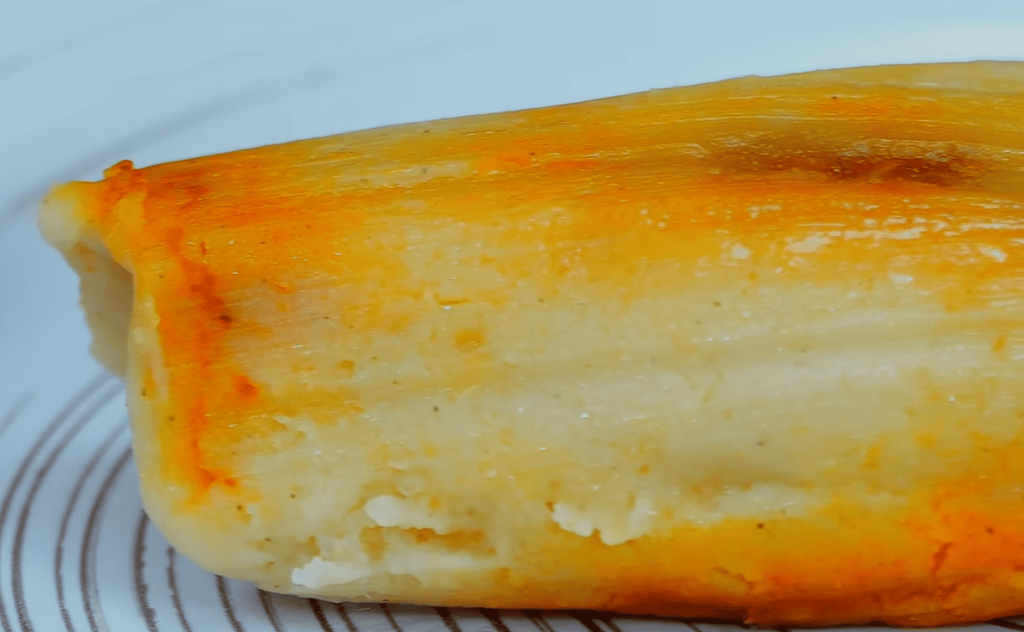
The bundles are done when the husk peels away easily. They may still look wet when first removed. Let them rest for 10-15 minutes for the masa to set properly.
| Cooking Method | Time Required | Special Instructions |
|---|---|---|
| Traditional Steamer | 50 min – 2 hours | Check water every 30 minutes |
| Instant Pot | 30-40 minutes | Use steam function |
| Frozen (thawed) | 50 min – 1½ hours | Add 10-15 minutes if frozen |
Remove one bundle and let cool for 5-10 minutes before testing. If it releases easily and holds its shape, your cooking is complete.
Handy Tips and Make-Ahead Strategies
Smart planning can transform this multi-step recipe from overwhelming to completely manageable. Breaking the work across several days makes the process accessible for busy home cooks.
You can prepare the meat filling and red sauce one day in advance. The dough can wait another day or two before assembly.
This flexible timeline means you don’t need to complete everything in one session. Spread the work over three days if needed.
Preparing the Filling and Masa in Advance
Refrigerating the broth overnight offers a practical benefit. The fat solidifies at the top, making it easy to remove for a cleaner final product.
If your filling is cold during assembly, allow extra steaming time. The chilled ingredients may require longer cooking.
Fresh masa delivers superior flavor compared to instant mixes. Source brown rendered fat from Mexican markets for authentic results.
Enhancing Flavor with Extra Salsa in the Dough
Adding salsa to your masa can make or break the final result. This step infuses moisture and deep flavor throughout each bite.
Always incorporate red or green sauce into savory varieties. The extra liquid enhances the dough’s texture and taste.
Use the float test to verify your masa readiness. Microwave a small sample to check salt levels before assembly.
Having all ingredients prepped and organized creates a smoother experience. This professional approach reduces stress and improves results.
Red Pork Tamales: Essential Techniques
What makes this particular preparation stand out is the direct lineage it carries from generations of family expertise. This isn’t just another formula—it’s a treasured heirloom.
Mastering the Authentic Recipe
The ultimate validation came from native taste-testers in Guadalajara. After thorough testing, Tia Rosa declared these bundles “officially VERY Mexicano y muy ricos.”
Every Mexican family has their own cherished version. Feel free to adapt this preparation to make it your own tradition.
This specific method comes from Tia Marta near Tijuana. Her mother, the late Tia Pava, was renowned for creating the best versions.
The authentic taste comes from traditional fresh masa and incredibly flavorful salsa roja. Time-honored techniques for preparing the meat ensure superior results.
You can expect to make between 14-24 servings depending on size. A handy converter tool helps adjust quantities for different needs.
While this dish requires significant effort, the reward is genuine Mexican cuisine at its finest. The incredible flavors make every minute in the kitchen worthwhile.
Serving, Storing, and Reheating Ideas
Your beautifully crafted bundles deserve to be enjoyed at their absolute best, whether served fresh or saved for later. Proper handling ensures every bite maintains that homemade quality you worked so hard to achieve.
In Michoacán and many regions, these creations are traditionally served simply with warm atole or champurrado. These sweet, comforting Mexican drinks perfectly complement the savory flavors. Some families add their own regional touches with extra salsas or toppings.
Creative Presentation and Serving Suggestions
For special occasions, consider unwrapping your creations and plating them artistically. A drizzle of extra sauce and fresh garnishes can elevate the presentation. Serve alongside traditional Mexican rice and beans for a complete meal experience.
Best Practices for Refrigerating and Freezing
Always let cool completely before storing. In the refrigerator, they last 4-5 days when kept in an airtight container. This prevents the masa from drying out.
For longer storage, freezing is excellent. You can freeze them cooked or uncooked. Uncooked versions yield better flavor when eventually prepared, though they require more minutes to cook later.
Use vacuum-sealed bags or tight containers for freezing. Label with dates for easy tracking.
Reheating methods offer flexibility. Steaming takes 10-15 minutes and works best for large batches. The microwave method wraps each piece in a damp paper towel for 1-2 minutes.
For a crispy exterior, try skillet frying. Remove the corn husks and fry each side for 3-5 minutes over medium heat. The comal method keeps the husks on, creating a slightly smoky flavor as you heat each side for 4-6 minutes.
Conclusion
Each carefully assembled bundle carries the potential to become part of your own family’s story and celebrations. The journey from selecting quality ingredients to steaming the final product connects you to authentic Mexican culinary traditions.
While this recipe requires dedication, the reward is incredible. Homemade versions offer flavors that store-bought tamales simply cannot match. Don’t feel intimidated by the process.
With the techniques shared here, you can create delicious pork tamales that honor this beautiful tradition. Gather your family and embrace the experience together.
You now have all the knowledge needed to succeed. Your kitchen can become the next chapter in this ancient culinary story.