While traditional masa-based dishes hold deep cultural roots, their modern plant-based versions are rewriting holiday traditions. These steamed corn masa pockets maintain authentic textures through clever ingredient swaps, proving meat-free alternatives can shine. The secret? Replacing animal fats with coconut oil or vegetable shortening creates that signature tender crumb without compromising flavor.
Perfecting these handheld delights requires patience but rewards with endless customization. From smoky chipotle-spiced jackfruit to roasted poblano strips, fillings adapt to any dietary preference. Families often gather during festive seasons to prep dozens together, turning cooking into cherished bonding time.
Our step-by-step guide demystifies the process for home cooks. You’ll master spreading masa evenly on husks, layering vibrant fillings, and achieving that ideal steamed texture. Pro tip: Freeze extras for quick meals – they reheat beautifully!
Key Takeaways
- Plant-based fats like coconut oil replace lard without sacrificing authentic texture
- Steaming technique ensures moist, tender masa every time
- Customizable fillings accommodate diverse dietary needs and flavor preferences
- Group preparation makes cooking social and efficient
- Freezer-friendly nature allows make-ahead meal planning
Ingredients and Preparation Essentials
Mastering plant-based masa creations begins with selecting the right components. Quality ingredients ensure your corn pockets hold their shape while delivering that signature airy texture. Let’s break down what you’ll need to craft these handheld treasures.
Dry Ingredients Overview
Masa harina forms the foundation – choose brands labeled “for tamales” for optimal results. This finely ground corn flour behaves differently than standard cornmeal, absorbing liquids more efficiently. Baking powder acts as your secret weapon, lifting the dough during steaming for that perfect fluffy bite.
Don’t overlook salt’s dual role: enhancing flavors and balancing the corn’s natural sweetness. Dried corn husks complete this category, requiring a 30-minute soak in warm water before wrapping. Look for wide, pliable husks in Latin grocery aisles or online retailers.
Wet Ingredients and Liquids
Refined coconut oil replaces traditional animal fats, providing richness without overpowering notes. “The right oil makes masa dough spread like velvet on soaked husks,” notes seasoned cook Maria Gonzalez. Vegetable broth adds depth, while chilled water helps achieve the ideal dough consistency – neither crumbly nor sticky.
Combine these elements thoughtfully, and you’ll create masa that peels cleanly from husks after steaming. Remember: proper hydration is key. Test your dough by floating a teaspoon-sized ball in water – if it bobs to the surface, you’re ready to assemble.
Step-by-Step Guide to Make Vegan Tamales
Crafting delicious plant-based masa pockets becomes manageable when you break down the steps. This hands-on process transforms simple ingredients into flavorful bundles through careful timing and technique.
Understanding the Recipe Flow
First, soak dried corn husks in warm water for 30 minutes. Use this waiting period to organize your workspace and gather ingredients. Next, prepare the masa dough using chilled vegetable broth and coconut oil for richness.
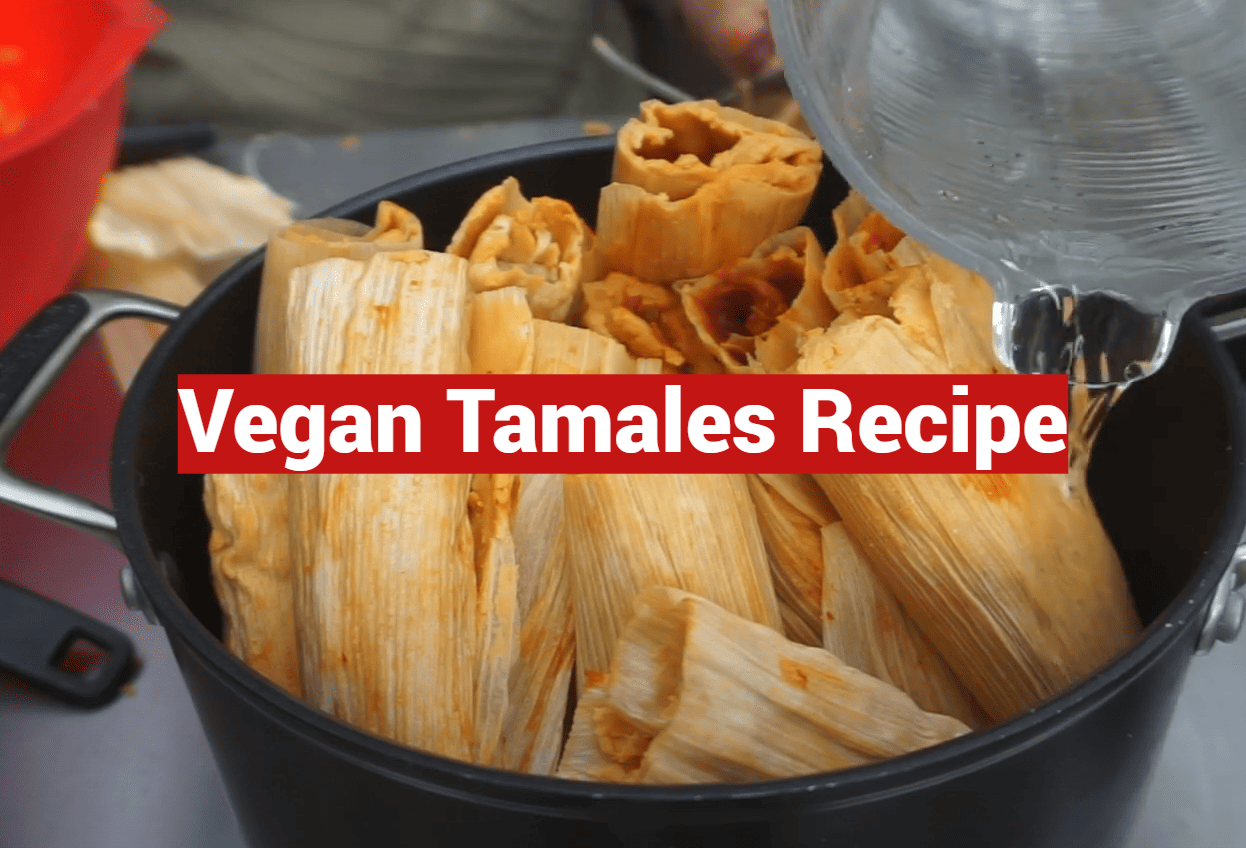
While the dough rests, create your fillings. Roasted vegetables or spiced beans work beautifully. Assemble the masa pockets by spreading dough onto softened husks, adding fillings, and folding neatly. Finally, steam bundles for 35-90 minutes until the masa pulls away cleanly.
| Step | Traditional Method | Plant-Based Approach | Time Required |
|---|---|---|---|
| Husk Prep | 30+ minute soak | Same soak time | 30-40 mins |
| Masa Base | Lard-based | Coconut oil | 20 mins |
| Steaming | Single batch | Layered batches | 35-90 mins |
Pro tip: Enlist helpers for assembly! The repetitive folding becomes faster with multiple hands. Most cooks need 3-4 hours total, but the social experience makes time fly. “It’s like edible teamwork,” laughs home chef Lisa Martinez.
Plan your session on a relaxed afternoon. The rhythmic process becomes almost meditative once you find your groove. Perfect for turning meal prep into memory-making moments.
Essential Tools and Equipment for Tamale Making
Equipping your kitchen with the proper tools transforms masa preparation from daunting to delightful. These essentials streamline assembly while preserving traditional techniques. Let’s explore what you’ll need to craft flawless corn-husk bundles.
Stand Mixer, Steamer, and Other Must-Haves
A sturdy stock pot with a tight-fitting lid forms your steaming powerhouse. Pair it with a collapsible metal steamer basket – its elevated platform keeps husks dry. For faster results, an Instant Pot cuts cooking time by 40% using its pressure-steam function.
Your stand mixer’s paddle attachment whips masa dough to pillowy perfection in minutes. “Hand-mixing works too,” says culinary instructor Carlos Mendez, “but mechanical help prevents arm fatigue during large batches.” Keep measuring cups nearby for precise liquid ratios.
- Wide counter space for assembly-line wrapping
- Cookie scoops for uniform masa portions
- Corn husk strips or kitchen twine for secure ties
- Colander for rinsing and draining husks
Don’t forget a deep bowl for soaking husks – they’ll need 30 minutes to become pliable. With these tools prepped, you’re ready to create plant-based masa magic that honors tradition while embracing modern convenience.
Preparing the Masa Dough
The foundation of memorable masa creations lies in mastering dough preparation. This stage determines whether your corn pockets will be feather-light or leaden, making technique as crucial as ingredient quality.
Mixing Techniques and Ingredient Ratios
Start by whisking masa harina with baking powder, cumin, and garlic powder in a stand mixer. “The dry blend needs uniformity,” advises chef Maria Gonzalez. “Lumps here mean uneven flavor later.” Gradually pour melted coconut oil into running paddles to create silky texture.
Warm vegetable broth incorporation follows next. Add it in thirds, letting each pour fully absorb before continuing. This prevents gummy spots and ensures smooth spreading consistency. Beat 8-10 minutes on medium speed – the dough should resemble thick cake batter.
| Aspect | Traditional | Plant-Based | Key Difference |
|---|---|---|---|
| Fat Source | Lard | Coconut Oil | Smoke Point |
| Mixing Time | 5-6 mins | 8-10 mins | Aeration Needs |
| Liquid Temp | Room Temp | Warm Broth | Hydration Speed |
| Float Test | Optional | Essential | Texture Check |
Masa Float Test Explanation
Roll a teaspoon of dough into a ball. Drop it in water – success floats, failure sinks. Floating means proper air incorporation and fat distribution. “It’s science you can see,” notes Gonzalez. If it sinks, beat 2 more minutes and retest.
This simple check prevents steaming disasters. Properly whipped masa peels cleanly from husks and holds fillings without cracking. Patience here rewards you with tender, cloud-like results worth the effort.
Soaking and Preparing Corn Husks
The unsung hero of perfect masa pockets lies in proper corn husk preparation. These natural wrappers require careful handling to become flexible partners in your culinary creations. Let’s explore how to transform brittle husks into pliable packaging gold.
Optimal Hydration and Cleaning Steps
Start by sorting dried corn husks like a treasure hunter. Discard torn pieces and save wide, intact specimens. Rinse them under cool running water to remove field dust – imagine giving each husk a refreshing shower.
Submerge cleaned husks in warm water (110°F works best) for 30+ minutes. Use a heavy bowl as a paperweight to prevent floating. Pro tip: Add 1 tsp salt per gallon to soften fibers faster without altering taste.
| Step | Time Required | Common Mistakes | Success Signs |
|---|---|---|---|
| Sorting | 5 minutes | Keeping small husks | Uniform 6″+ sizes |
| Rinsing | 2 minutes | Rushing water flow | Clear runoff |
| Soaking | 30-90 minutes | Using hot water | Bendable texture |
Pat husks dry with towels after soaking. Dampness causes masa slippage, while bone-dry husks crack. Test flexibility by folding a corner – it should crease smoothly like new leather. Chef Elena Ruiz advises: “Treat husks like delicate fabric – gentle handling makes wrapping effortless.”
Store prepped husks under damp cloths until assembly. This maintains moisture without water pooling. Now you’re ready to create flawless bundles that steam evenly and peel cleanly!
Making the Vegan Fillings
Fillings transform masa pockets from simple to spectacular. Bold flavors and varied textures let each bite tell its own story. Whether you crave smoky spices or garden-fresh crunch, these combinations deliver satisfaction without compromise.
Taco-Spiced Protein Options
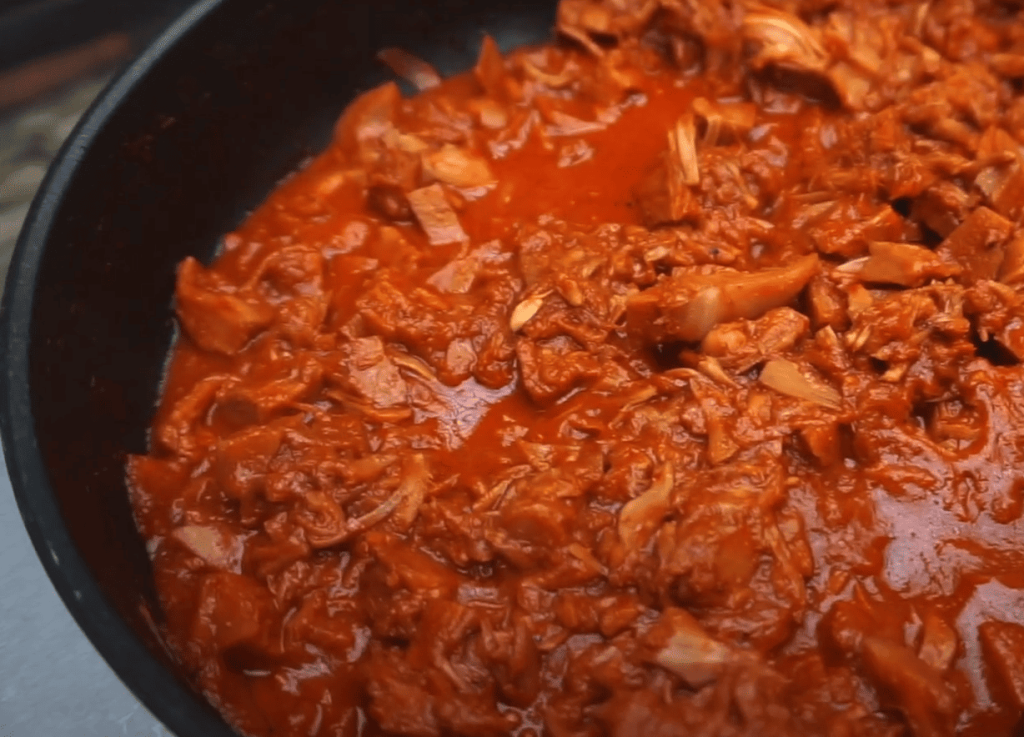
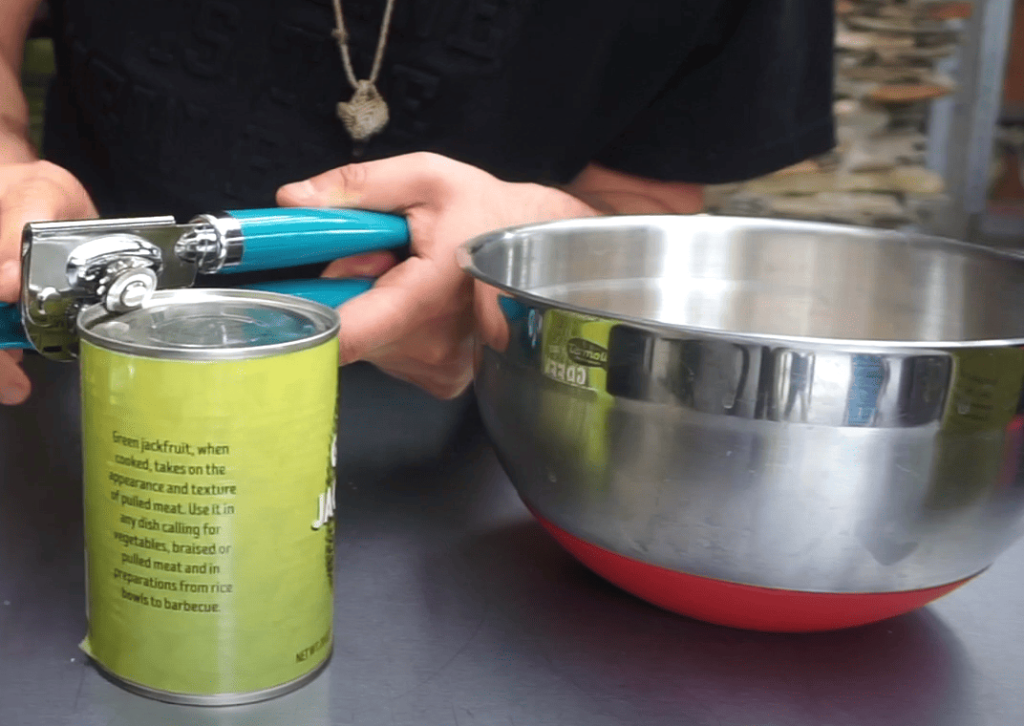
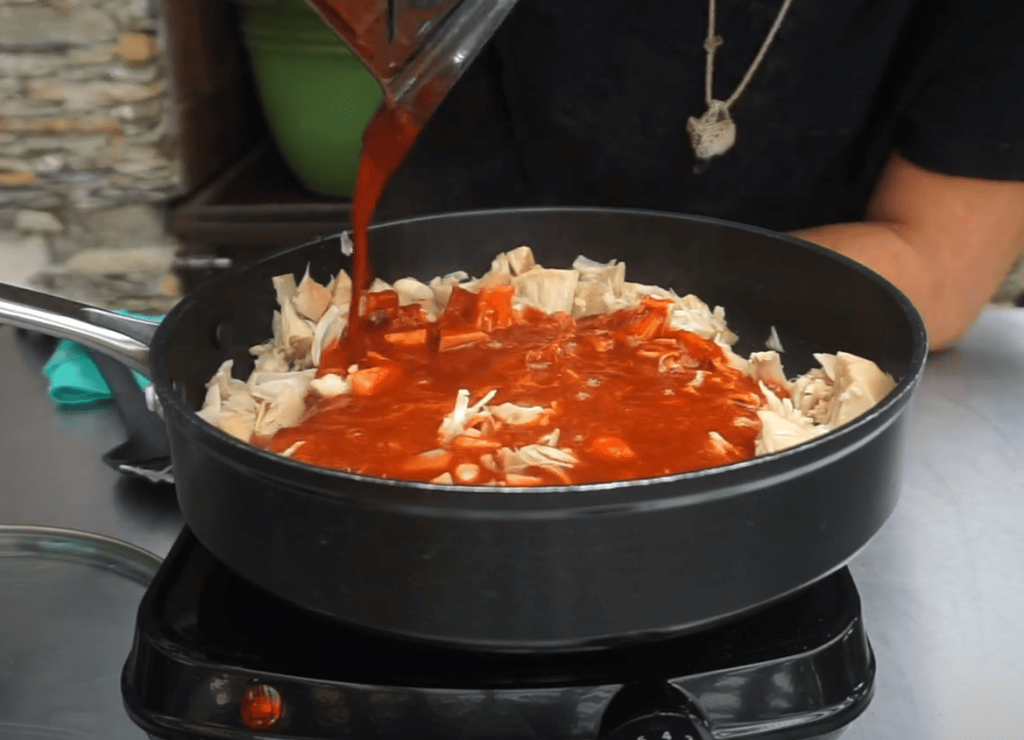
Textured vegetable protein (TVP) soaks up flavors like a sponge. Simmer it with onion, garlic, and smoked paprika for a meaty texture. Shredded jackfruit shines when cooked with cumin and oregano – its fibrous strands mimic pulled pork beautifully.
Chef Rosa Márquez recommends: “Toast spices in olive oil first. It unlocks oils that cling to every ingredient.” Add liquid aminos for umami depth or nutritional yeast for cheesy notes. Both options freeze well for future batches.
Vibrant Vegetable Combinations
Black beans and roasted corn create hearty bases. Sauté with diced poblanos and lime zest for zing. Try these winning pairs:
- Caramelized onions + oyster mushrooms
- Fire-roasted peppers + spinach
- Sweet potatoes + chipotle paste
For creamy textures, blend cashews with garlic into spreads. Let mixtures cool before wrapping – hot fillings make masa gummy. Pro tip: Layer multiple textures! Crunchy jicama slaw atop spicy beans adds delightful contrast.
Assembling the Tamales
Perfectly folded corn husks turn dough and fillings into culinary treasures. This hands-on stage brings all your prep work together, creating neat packages ready for steaming. With practice, you’ll develop a rhythm that yields restaurant-quality results every time.
Folding and Wrapping Methods
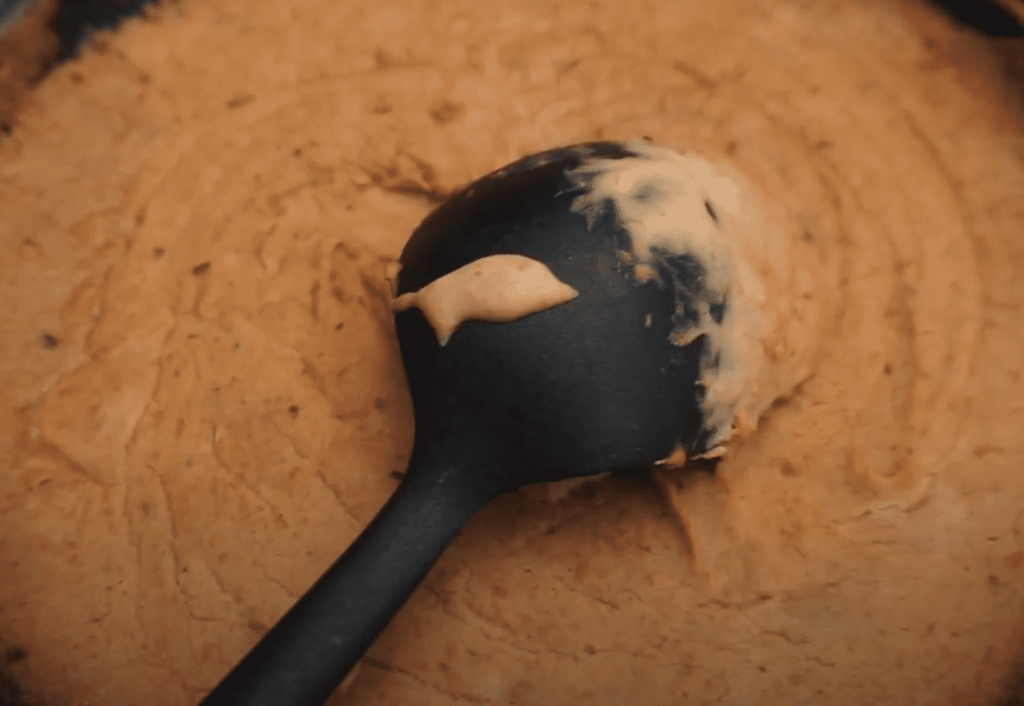
Lay a soaked corn husk flat with the pointed side facing you. Spread ¼ cup masa into a 5-inch square, leaving ½ inch space at the top. Wet fingers prevent sticking and help achieve that ideal ½-inch thickness – crucial for even cooking.
Center 2 tablespoons of filling on the dough. Fold both long sides inward until they overlap, then tuck one edge under the other. Flip up the bottom flap and secure with a husk strip. “Think of it as wrapping a flavorful present,” says chef Diego Cruz.
Consistent pressure ensures tight seals without masa squeezing out. If bundles feel loose, add an extra husk strip crosswise. Properly wrapped packages hold their shape during steaming while letting heat circulate freely.